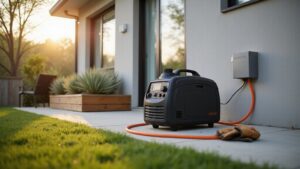
Worried about protecting your generator from the elements? Building a DIY cover can keep it safe from rain, wind, and debris while allowing proper ventilation.
By following a few simple steps, you’ll be able to create a sturdy, weather-resistant shelter that fits your generator perfectly and stays secure outdoors.
The full details are right below to help you get started.
Measure Your Generator and Plan the Enclosure Layout
Measure your generator’s true footprint, including all protrusions like control boxes, handles, and exhaust outlets. Accurate measurements prevent undersizing the cover opening, ensuring the enclosure fits properly. Record the actual generator dimensions rather than just the cabinet size, then add clearance for service and airflow around each side. Typically, you should allow about 24 inches on each side and 36 inches at the generator end to facilitate maintenance access. Consider that using a parallel kit can help you combine two generators for increased power output, though this requires additional planning for enclosure size.
Plan the intake and exhaust airflow paths carefully. Place vents on different sides to prevent hot-air recirculation, which can impair generator performance. Size these openings based on the cooling airflow requirements, not solely on the outer enclosure dimensions. Reserve space for routine service points such as filters and oil drains, and avoid structural features that could block access to these areas. Finally, sketch the generator layout first, then draw a second boundary that includes all clearances. Mark internal dimensions separately from the external footprint to verify that your enclosure will fit the actual site conditions. To ensure long-term reliability, periodically apply a deep cycle battery test to diagnose the starting battery’s health and avoid unexpected failures during operation. If the battery fails this test, consider that a deep cycle battery can serve as a durable alternative for starting in some applications, though it is not ideal for standard car starting systems.
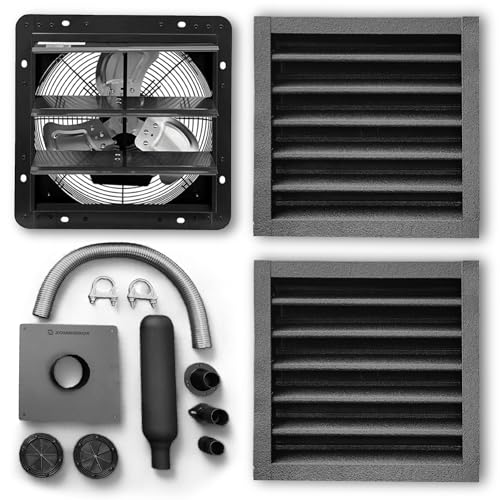
COMPLETE CLIMATE CONTROL SYSTEM: The all-in-one solution for building or upgrading your DIY generator enclosure. This comprehensive kit solves the two biggest problems with...
Pick the Best Materials and Build a Strong Frame
Choose durable, weather-resistant materials for your generator cover frame. Heavy-duty vinyl with a PVC backing offers excellent water resistance, while 600D polyester with a waterproof lining provides a budget-friendly alternative. For fabrics used in running covers, insist on NFPA 701 flame-retardant materials to minimize fire hazards. Always check that your chosen material is compatible with your frame; avoid pairing flammable fabrics near hot surfaces. For optimal engine protection, select a 10W-30 oil that meets generator manufacturer viscosity recommendations. To maintain fuel freshness during extended storage, it helps to add a fuel stabilizer to the gas tank before covering.
For the frame itself, pressure-treated lumber or 2x2s are suitable for a simple DIY build. Reinforce joints with deck screws to ensure stability and use exterior-grade hinges for longevity. For maximum strength and corrosion resistance, consider steel or aluminum framing options. Fiberglass rods make lightweight but sturdy supports, especially in areas where weight savings are important. Even with wooden frames, adding aluminum flashing to roof panels can help shed moisture and prevent rot. Steer clear of cheap tarps, as they pose a significant fire risk. Focus on creating a structurally rigid frame so panels stay secure and safe during operation. For optimal performance, compare the top best inverter for portable generator options to ensure your cover accommodates exhaust and cooling airflow.

Weather Resistant – Protect your generator from sun and UV damage, rain, snow, dirt and more with this cover’s tough vinyl exterior

Compatible - More sizes for 5500w -15000w gas generator or inverter generator.

This heavy-duty generator cover is crafted from thickened 900D Oxford fabric. Featuring professional UV-resistant and waterproof technology, it withstands exposure to intense sunlight, rain, snow, wind, sand, and bird droppings, effectively preventing equipment fading and aging as well as component damage. The fabric is heat-resistant and resistant to deformation or melting. Combined with tight, sealed stitching that blocks moisture and dust, it is suitable for both indoor and outdoor use, extending the equipment’s service life.
Prevent Overheating With Proper Ventilation and Weatherproofing
Proper ventilation is essential for preventing overheating of your generator. To ensure effective airflow, design a clear path that includes intake vents positioned low to draw in cooler air and exhaust vents placed high to allow hot air to escape as it rises. Keep these openings on opposite sides to avoid hot-air recirculation, which can trap heat inside. Size your vents according to the manufacturer’s CFM (cubic feet per minute) specifications, and never skimp on their open area; larger vents support better airflow and cooling. Using a high-quality RV battery charger with a dedicated cooling fan ensures the power source itself does not contribute extra heat to the enclosure. Adding a whole home surge protector to the generator’s output line safeguards sensitive electronics from damaging voltage spikes. For the best performance, consult a battery charger review to confirm compatibility with your system’s needs.
For weatherproofing, install baffled louvers and rain hoods that shed water without obstructing airflow. Seal every vent frame tightly with gaskets to prevent wind-driven water from entering. Avoid using tight covers that reduce vent area, as they can trap heat inside, risking overheating. Maintain a clean radiator and ensure there is sufficient clearance around the unit to facilitate heat escape. Conduct a thermal run test under load conditions to verify your ventilation and weatherproofing setup effectively prevents overheating before finalizing your installation.

【304 Stainless Steel Roof Vent 】 Crafted from premium 304 stainless steel, this roof vent features one-piece molding for anti-deformation performance. Its smooth, burr-free surface eliminates sharp edges, ensure smooth and sustained operation;
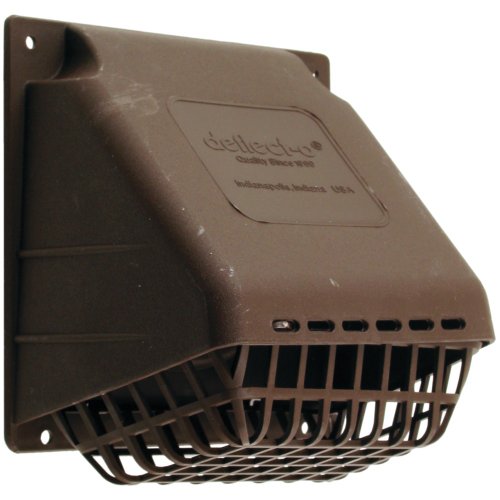
4 inch wide-mouth vent hood

【420D Waterproof Material】The roof ventilation hood is made of high-quality 420D waterproof Oxford cloth, with a silver layer inside, which is more waterproof and dustproof, lightweight and durable, and can be used for a long time.
Assemble the Enclosure and Test for Safety
To assemble the enclosure safely, start by ensuring the frame is square and the panels are firmly attached to prevent door misalignment and light leaks. Tighten fasteners gradually and evenly to avoid creating stress points that could warp the structure. Carefully align seams so that the enclosure maintains tight joins, minimizing light infiltration when viewed from inside a dark environment. Confirm that doors close flush against the frame to provide a reliable seal, and verify that the entire cover does not contact hot, moving, or electrical components, which could cause damage or safety hazards.
Before testing the enclosure, consider adding interior lighting to improve visibility during maintenance and inspections. Applying soundproofing materials can reduce noise levels inside, making operation more comfortable. Check that grounding connections are proper and include GFCI protection on electrical outlets for added safety. When running the generator, do so briefly in an outdoor, well-ventilated area, and ensure exhaust gases do not enter occupied spaces. Test alarms and shutdown controls to verify they respond correctly to faults or unsafe conditions. If you experience symptoms like dizziness or headaches, or detect electrical faults or excessive heat, stop operation immediately. Always prioritize safety by never operating the generator or enclosure in an enclosed space without proper ventilation.

【Complete Exhaust Venting Solution】 All-in-one kit safely redirects fumes. Includes 3 adapters, gasket, wrap, and rain cap. NOTE: Verify exhaust size before ordering; do NOT remove the original factory muffler during installation

[Attention]: (If the connector doesn’t fit, contact us for customization) The generator exhaust extension kit must be used in a generator shed generator quiet box. Generator silencer kit is only used to reduce the exhaust noise of the generator and does not reduce the mechanical noise of the generator itself. Please do not remove the built-in muffler of the generator

[Attention]: (Connector mismatch? Contact us for customization.) The generator exhaust extension kit must be used in a generator shed generator quiet box. Generator silencer kit is only used to reduce the exhaust noise of the generator and does not reduce the mechanical noise of the generator itself. Please do not remove the built-in muffler of the generator
Secure the Cover Against Wind and Rain Long-Term
To secure your generator cover against wind and rain long-term, start by anchoring it tightly with bottom straps, buckle closures, or elastic hem cords. Ensure the fit is custom-tight to minimize lift and flapping. For larger covers, add extra tie-down points to distribute the load across multiple anchors. Reinforce stress points at corners and seams, which are most vulnerable to wind pressure. Many covers like this one are made from 600D sturdy polyester fabric to provide durable weather resistance. Choose a fabric with a laminated or coated backing that is taped or sealed at seams for water resistance. Use a pitched or vaulted roof design to help rain runoff and prevent pooling. Make sure water is directed away from electrical areas, especially around intake openings. Opt for rip-resistant, heavy-duty materials like 600D polyester to enhance durability. Ensure the cover’s design accommodates the inverter generator’s compact size for a precise fit. Regularly inspect fastening hardware such as straps and buckles, replacing or adjusting them as needed to maintain a secure fit. Promptly remove standing water and debris from the cover to avoid sagging and stress on seams, prolonging its lifespan. If the cover is stored with the generator, always dispose of old gas safely to prevent fire risks from lingering fuel vapors. Installation procedures should always include verifying ground continuity to prevent electrical hazards from moisture exposure.
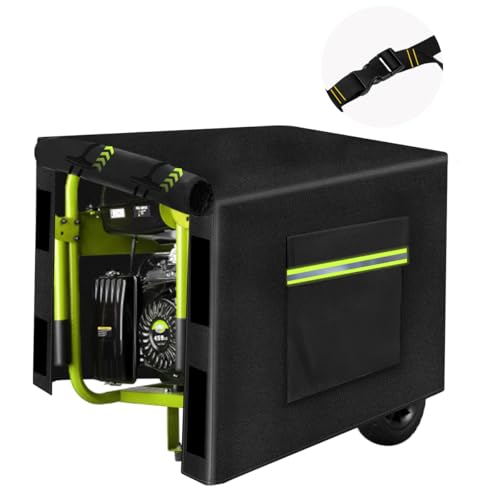
【HIGH QUALITY MATERIAL】 The generator tent is made of 600D polyester. Compared with other similar products, in addition to basic waterproof and UV protection, the most important thing is that it will not fade or tear under long-term high temperature and rain immersion. Don't worry about your generator being affected by outdoor elements, thus extending the life of your generator
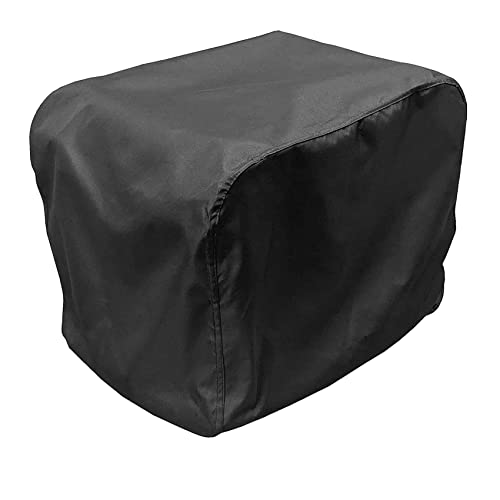
Optimized Design: Generator covers heavy duty waterproo.1),Double-Stitched Seams makes this generator cover is more Tear-Resistant, No cracks and Durable. 2),There is an elastic pull rope at the bottom with specially designed flexible channel, which can tightly wrap the cover around the generator.Even heavy rain and wind, it will protect your generator carefully.Waterproof & Windproof.easy install and remove.

Wide Compatibility--Measuring 30x30x26 inches, this cover universally fits most 6000-11000W gas generators and inverter generators. Multiple size options are available to match different portable generator models.