Ever find yourself stranded with a dead battery and wonder how to safely jump-start your vehicle? Using a NOCO jump starter is quick and straightforward once you know the right steps.
From inspecting the battery to connecting the clamps, mastering the process can save you time and hassle. Keep reading to learn how to do it properly and avoid common mistakes.
Pre-Checks to Complete Before Connecting Your NOCO
Before connecting your NOCO, perform these pre-checks to ensure safety and proper functionality. First, verify that your unit is sufficiently charged; a low battery can prevent the boost from working properly. Check the LED indicators and recharge if only a few bars remain. Turn off all vehicle electrical loads such as headlights, radio, and air conditioning to reduce the strain during startup. Inspect the battery and connection area for damage, corrosion, or moisture. Keep terminals clean and dry for optimal contact. Also, examine charging accessories like the cable and case for damage or wear. Make sure you are in a well-ventilated, dry location away from sparks, open flames, or fuel vapors. Additionally, never plug your NOCO into an extension cord with a surge protector, as this violates standard electrical safety rules. For reliable power when using a portable generator, consider an inverter designed for stable output. If the battery shows signs of swelling, cracks, or excessive corrosion, it may indicate deep cycle battery failure that requires replacement rather than a simple jump start. Lastly, read the specific instructions for your NOCO model, as some units have features like short timers that require prompt action during use.
Attach the Clamps the Right Way Every Time
Attach the black clamp to a clean, unpainted metal surface such as the vehicle’s negative terminal or a chassis ground point. This helps reduce the risk of sparks and ensures a good electrical connection. Avoid placing the clamp on greasy, rust-covered, or painted surfaces, as these can interfere with proper grounding. Always connect the positive (red) clamp first, followed by the negative (black), to prevent accidental shorts. Make sure the clamps are securely attached with firm, metal-to-metal contact to allow the NOCO device to accurately detect the battery. This firm connection also prevents voltage spikes that can damage sensitive electronics, much like a whole house surge protector safeguards your home’s circuits. After fastening both clamps, double-check that they are firmly held in place before proceeding. Verify that the clamps do not touch each other or any unpainted metal surface near the battery, as this could cause a short circuit. Confirm that the Boost LED lights up to indicate the unit is ready for a jumpstart. Unlike a propane tank’s fuel capacity, which is measured in 100 lb propane tank how many gallons, the NOCO’s battery relies on stored electrical energy for operation. Proper attachment and correct polarity are essential to avoid mishaps and ensure safe operation.
Turn On the NOCO Jump Starter: What the Lights Mean
After pressing the power button to wake the unit, the status LEDs provide clear signals about its current state. A solid white Power LED indicates the jump starter is powered on and ready for normal operation. The white Boost LED confirms jump-start readiness, which is essential for starting a vehicle or maintaining a battery. The charge-level LEDs display the internal battery power: four solid green lights mean the unit is fully charged. If the LEDs show a red Error light, it indicates a problem such as reversed polarity or overheating. A blue temperature light signals that it is too cold for operation, while a red temperature light warns that it is too hot. If the Boost LED stays off, the unit cannot detect a battery, meaning it isn’t ready for jump-starting. Ignoring error patterns can risk damaging the device, so understanding these signals helps you keep your jump starter reliable and ensure safe usage. For generator owners, ensuring your jump starter is fully charged is as important as knowing how long fuel stabilizer lasts to prevent starting issues. Knowing your jump starter’s capacity is similar to understanding the generator size required to power your RV air conditioner without overspending. This technology functions similarly to how MC4 connectors provide a secure and reliable electrical connection for solar panels.
Why Your NOCO Shows a Red Light (And How to Fix It)
A solid red Error LED on your NOCO jump starter usually indicates reverse polarity—meaning the clamps are connected incorrectly. To fix it, disconnect both clamps. Reconnect the red clamp to the positive terminal and the black clamp to the negative terminal. After doing this, the white Boost LED should light up, confirming correct connection. Always refer to the Ultimate Guide to Using Jump Starter Cables Safely for a complete overview of proper procedures.
If the red light stays on after reconnection, inspect the battery terminals for corrosion or debris. Clean them thoroughly to ensure a firm, metal-to-metal contact. Poor connections caused by dirt or corrosion can lead the device to mistakenly signal an error. For a more permanent solution, consider how a home battery backup compares on running cost and lifespan versus a generator.
Check that the clamps grip the terminals securely and are not damaged or frayed. Loose or damaged clamps can also create false error signals or prevent proper current flow.
A blinking red light indicates overheating. If this occurs, stop using the jump starter immediately and allow it to cool down in a safe, ventilated area. When cables are attached and the red light blinks, it could also point to a short circuit. In that case, disconnect the clamps and inspect the cables for any damage or exposed insulation.
If the solid red error persists after these checks and fixes, reverify polarity, clean the terminals, and ensure the device has cooled down sufficiently. Continued error signals may mean the battery needs professional testing or replacement. Unlike jerry cans, NOCO jump starters are designed for portable electrical power rather than fuel storage.

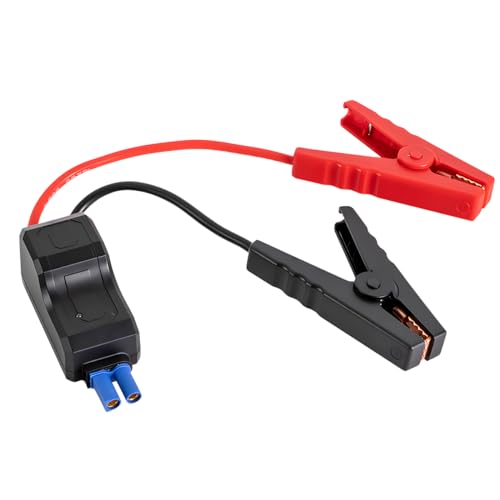
Heavy-duty battery clamps designed for NOCO Boost and Boost X UltraSafe Lithium Jump Starters..Fit Type: Universal Fit
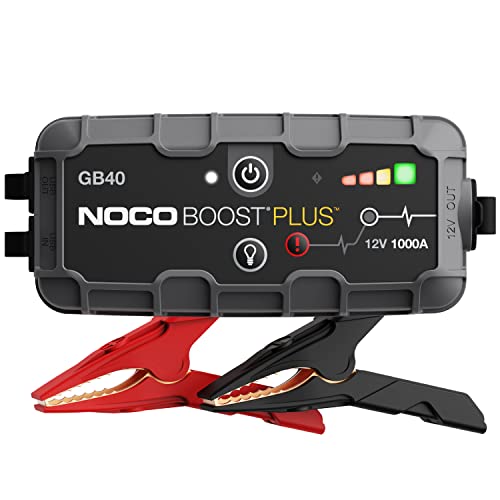
START DEAD BATTERIES — Instantly start dead batteries with 1000 amps of peak lithium power. Up to 20 starts per charge on engines up to 6.0L gas and 3.0L diesel.

Dual-purpose battery clamp accessory with integrated M6 eyelet terminal connectors.
What to Do If the NOCO Jump Starter Won’t Power On
If your NOCO jump starter won’t power on at all, showing no lights when you press the button, the issue could be a deeply discharged battery or a battery-management lockout. Start by charging the device using the correct USB port and a 5V adapter. You should see indicator activity within a few hours; if not, check your cable and charger to ensure they are functioning properly. This process is similar to how a power inverter converts stored DC power into usable AC electricity when needed. For example, always avoid reverse polarity when connecting cables to prevent damage to the device.
If the battery voltage has dropped below the threshold, the BMS may prevent charging until voltage is raised with a trickle charger on the load side. This concept is similar to how an automatic transfer switch ensures a backup power source engages only when the main supply fails.
Perform a full reset by holding the power button for 45 seconds until the LEDs cycle. Then, wait a few moments and press the button again. If the jump starter still remains unresponsive, a battery calibration process may be necessary—it involves leaving the device connected to a charger continuously for 12 hours.
In some cases, updating the firmware can help reset the internal logic. However, this only works if the unit briefly powers on during the process. If after trying these steps the device remains silent and unresponsive, it likely indicates an internal failure that requires professional service or replacement.
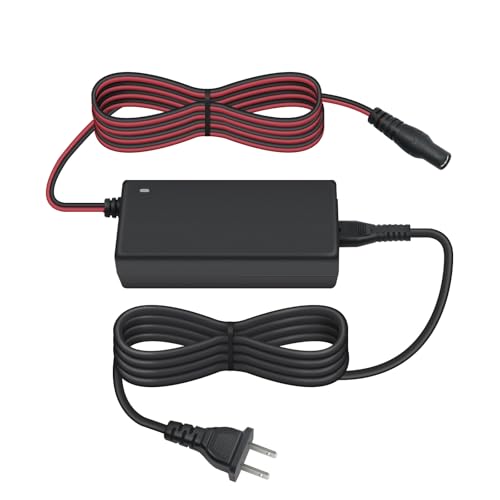
【Compatibility】 Replacement 56W XGC4 charger for NOCO Boost UltraSafe lithium jump starters — works with GB70, GB150, GB250+, GB251+, GB500, and GB500+ models. Check your port type before ordering

Compatibility:14V AC/DC power adapter charger for NOCO Genius Boost UltraSafe jump starters, fully compatible with GB70, GB150, GB250+, GB251+, GB500, GB500+ models. It works as an ideal replacement for the original NOCO XGC4 power supply cord, ensuring seamless charging performance just like the factory charger.
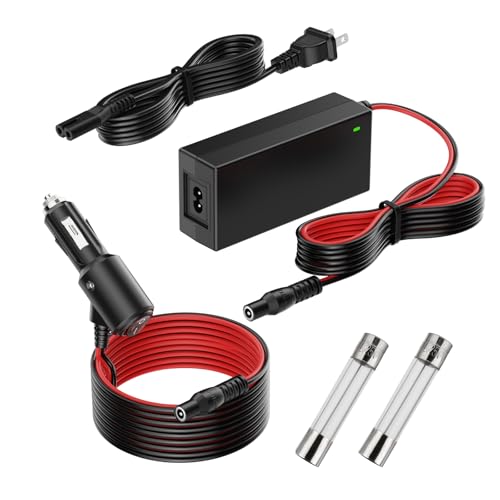
【14V 4A 56W Power Adapter Compatible Models】for noco gb70 boost hd 12v 2000a charger Compatible with NOCO GB70 GB150 GB250+ GB251+ GB500 GB500+ Genius Boost Ultra Safe Lithium Jump Starter Battery(𝐍𝐨𝐭 𝐚𝐩𝐩𝐥𝐢𝐜𝐚𝐛𝐥𝐞 𝐭𝐨 𝐭𝐲𝐩𝐞-𝐂 𝐜𝐨𝐧𝐧𝐞𝐜𝐭𝐨𝐫)
Crank the Engine After the NOCO Boost Light Appears
Once the white Boost LED glows steadily, you can crank the engine. Don’t wait—turn the key immediately. Your NOCO unit provides full starting power now, and most engines will start right away. Confirm that all vehicle loads such as headlights, radio, and A/C are turned off. Proper clamp connection and correct polarity are essential; a red error light indicates a problem that must be fixed before proceeding. For safe permanent power solutions, it is wise to consult guidelines on connecting a transfer switch to prevent backfeeding hazards. For homes relying on natural gas, a top-rated backup generator ensures reliable power during outages.
The time it takes for the Boost LED to stabilize depends on your vehicle’s battery capacity. Deeply discharged batteries may require up to 30 seconds of connection before the white light appears solid. Using features like manual override can help in these cases. Once the white LED is steady, proceed to crank the engine without delay.
If the engine does not start, wait a moment before trying again. Avoid excessive cranking—your jump starter needs rest between attempts. A solid white Boost light indicates the unit is ready. Trust that signal and continue. Consult the correct oil type and capacity for your specific generator model to ensure proper maintenance.
Car Won’t Start After Boost Light? Wait 30 Seconds and Retry
If the engine doesn’t start after the white Boost LED appears, wait 20 to 30 seconds before trying again. This pause allows your vehicle’s electronics and battery to stabilize, which is a normal part of the jump-start process. During this time, make sure the clamps stay firmly attached and that the boost indicator remains solid. A quick retry before this stabilization can ignore important vehicle warnings and may prevent successful starting. If the second attempt also fails, the problem likely stems from issues like poor clamp contact, a deeply discharged battery, or a vehicle-side fault, rather than the jump starter itself. Keep the clamps connected, hold the ignition briefly, and trust the process—waiting twenty seconds often helps avoid unnecessary complications. For a permanent power solution, comparing diesel generator running costs against gas models reveals diesel’s higher efficiency for sustained loads. Always store your propane tank in a well-ventilated outdoor area away from ignition sources to prevent dangerous gas accumulation.

POWERFUL CAR BATTERY JUMP STARTER: The ET03 car battery jump starter can easily jump-start all 12V common vehicles with up to 8.0L gas and 7.0L diesel engines in seconds with its peak current reaching 4000 amps. Supports 50 jump starts at most on a single charge and suitable for lawnmowers, motorcycles, passenger cars, trucks, and even boats, etc.
【Five Fold Protection】: This product can be anti-reverse charging, anti-over-discharging, anti-over-current, anti-reverse connection, anti-short circuit. Intelligent alarm system, safe and durable, built-in small wire to stabilize the current. Used to connect (car emergency jump starter and car battery), start the car, can prevent the positive and negative poles of the power supply collision and thus lead to short-circuit situation, high safety factor.

【Powerful Battery Starter】The OXILAM car jump starter delivers a powerful peak current of 6000A, capable of quickly reviving a dead car battery in just seconds—even in extreme temperatures. A single full charge provides up to 60 jumpstarts. 2024 upgraded jumper cables can safely start all gas engines and 12L diesel engines, including 12v vehicles, motorcycles, pickups, RVs, tractors, trucks, vans, ATVs, snowmobiles, yachts, and many more. Say goodbye to being stranded due to a dead battery
The NOCO 5-Jump Rule: Safety Limits You Need to Follow
You should never exceed five consecutive jump starts within a fifteen-minute period. This safety limit is mandatory, not optional, and is designed to prevent overheating and damage to your jump starter. After each attempt, wait at least twenty seconds to help stabilize your vehicle’s battery. Once you reach the five-attempt limit, allow the jump starter to rest for fifteen minutes before trying again. This cooldown period helps prevent heat buildup and reduces the risk of fire or explosion. Never attempt to jump-start a damaged or frozen battery, and always work in a well-ventilated area. Before starting, turn off all vehicle loads like lights, radio, and AC, and wear eye protection for safety. If you need to use Manual Override on a deeply discharged battery, proceed with extreme caution because it disables spark-proof and reverse-polarity protection. Follow these rules strictly to protect yourself, your equipment, and your vehicle.
Disconnect the Clamps After Your Car Starts
Once your car engine is running, it’s crucial to disconnect the battery clamps immediately. This prevents unnecessary current flow and lowers electrical risks. If your NOCO unit has a power-off function, turn it off first, following the model’s instructions. Then, remove the clamps in the correct sequence: for standard negative-ground systems, take off the black (negative) clamp first. Always keep the clamp ends from touching each other or any metallic surface to avoid sparks. This aligns with the standard guidance to remove clamps in the order of connection after turning off the unit.
This sequence is essential for compatibility with different vehicle batteries and ensures safe charging procedures for future use. Never leave the clamps connected while the engine runs, and keep them away from moving parts. The user guides for models like the GB40 and GBX155 consistently emphasize this disconnection step as the final part of the process—do it every time to stay safe.