If you’re wondering how to safely adjust your propane regulator, you’re in the right place.
Proper adjustment can help ensure your flames burn steady and your system stays safe.
You’ll learn how to identify adjustable parts, make small turns, and check pressure—all essential steps to keep your propane setup functioning correctly.
The full details follow to help you do it right.
Is Your Propane Regulator Adjustable? Check First
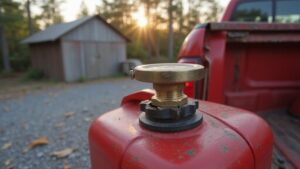
Your propane regulator’s adjustability is the first thing to check before attempting any modifications. Not all regulators are tweakable. Many standard grill regulators are fixed, meaning they deliver a set pressure suitable for household use and do not have adjustment features. Look closely at the regulator body for signs of adjustability: a sealed cap, a screwdriver slot, or a hex-shaped cover. These indicate that the regulator can be adjusted. If you do not see any of these interfaces, treat it as a fixed unit unless the manufacturer’s documentation specifies otherwise. High-pressure regulators found on torches or specialized equipment are generally not meant for adjustment and come with serious limitations. Turning the wrong screw on these can cause damage to your appliance or lead to dangerous leaks. Always verify your specific model’s design with the manufacturer’s specs before attempting any adjustments to ensure safety. For those with adjustable models, understanding the regulator’s design is key, as selecting a unit with consistent pressure output is a hallmark of top-rated propane tanks that ensures reliable performance across various appliances. For portable applications, pairing your regulator with a top-rated inverter can help maintain stable power delivery for sensitive electronics.

USER FRIENDLY AND TOP QUALITY CONNECTION - this high-pressure regulator and hose is adjustable from 0-20 psi with its red knob and has a top notch output for a wide variety of propane appliances from burners and heaters to smokers and fryers

✓ PROPANE BRASS ORIFICE FITTING SIZES - 3/8 flare M x 1/8 MNPT

【0-30 PSI Adjustable & Built-in Gauge】 Easily control flame intensity with the adjustable red knob, ranging from 0-30 PSI. Built-in pressure gauge allows precise heat regulation for optimal appliance performance
Where to Find the Adjustment Screw (Cap, Knob, or Slot)
The adjustment screw is typically located on the top or side of the regulator. It’s often concealed under a protective cap, inside a slotted opening, or beneath a removable plug. The design of your regulator determines how the screw appears. Many units have a cap-style access point that can be removed with a wrench or by hand. Others feature a large slotted screw housed in a round protrusion; once you remove the plug, access improves significantly. Some regulators include a small knob—usually with direction markings near the pressure control area. Recessed openings may be hidden beneath plastic covers that require a screwdriver to access. If you cannot find a cap, knob, or slot, the regulator is likely not adjustable. Always ensure the wiring and fitting details are secure to prevent pressure drops. For generator owners, understanding battery capacity ratings helps ensure your regulator settings support consistent power during extended use. A generator like the Predator 3500 requires precise oil volume to maintain stable engine performance under varying loads.
Tools and Safety Gear You’ll Need Before Starting
Before working with propane, assembling the right tools and safety gear is essential. Start with goggles to protect your eyes from sparks or debris and wear flame-retardant clothing to prevent igniting from sparks or heat. Use appropriate gloves to handle fittings and hoses safely and add respiratory protection if working in confined or poorly ventilated spaces. For tightening fittings, a non-adjustable wrench between 10 and 12 inches provides leverage without overtightening. Keep a screwdriver handy for accessory hardware adjustments. Always check that your tools are the correct size to avoid damaging fittings or over-tightening. After making adjustments, test for leaks with a soap-and-water solution—not a flame—to ensure safety. Verify that your regulator and hoses are compatible with propane and secure your cylinder upright in a well-ventilated area away from any sources of ignition. Finally, keep your hands and gloves clean and oil-free to maintain a safe and secure working environment. For truck-mounted systems, a heavy-duty power inverter for truck can help run tools and safety equipment reliably while you work.

PROTECTS PROPANE HOSES FROM ANIMAL DAMAGE - Prevent costly hose damage caused by animals attracted to dripping meat juices with the FryOilSaver B90C Propane Hose Cover. When grilling, juices drip onto unprotected hoses, drawing rodents or pets that may chew and puncture the line.

Adjustable from 7,000 BTU/hr to 12,000 BTU/hr

One Pound Propane tank regulator Outlet pressure range: 6”-18” W.C (suitable for low pressure gear only), Output Thread 12mm Thread M12*1.5( Compare yours before order)
Measure Your Current Outlet Pressure With a Gauge
Turn on the propane supply and allow the system to stabilize under full operating conditions. Once the pressure stabilizes — meaning it stops drifting or fluctuating — take your outlet pressure reading. For standard residential systems, this typically measures around 11 inches water column or about 27 millibars (mbar). If your reading falls outside your manufacturer’s specified range, the regulator may require adjustment. Record this measurement accurately before making any changes, as it provides your baseline for subsequent adjustments. To determine overall battery health, a multimeter voltage check is a reliable quick test that reveals state of charge and potential cell issues. Using a fuel stabilizer can help maintain consistent fuel quality in your generator, preventing system blockages and pressure irregularities. For consistent electrical performance from your devices, consider pairing your propane system with a reliable car lighter power inverter to convert DC to AC power efficiently.

Adjustable Propane Regulator: You can control the flame intensity by adjusting the pressure from 0-30 PSI according to your needs

PRECISION ADJUSTABLE OUTPUT:high pressure propane regulator reduce the gas pressure, adjust the output gas pressure by the control knob, and accurately control the flame size

Compatibility: The QCC1 to 3/8 inch female flare propane hose, with 3/8'' male flare to 1/8" MNPT adapter, it is compatible with your grills, turkey fryers, fish fryers, burners, outdoor cookers & stoves, smokers, heaters, fire pits, propane forges and more appliances with 3/8" or 1/8" male flare.
Adjust the Propane Regulator: Tiny Clockwise Turns Only
When adjusting your propane regulator, only make tiny clockwise turns. Start with very small increments, such as 1/16 to a quarter-turn, using the adjustment screw located under a cap that may have a slot or Allen head. Turn it slowly and deliberately, avoiding rushing the process. After each turn, pause briefly to allow pressure to stabilize within the system. This cautious approach helps prevent overshooting your target pressure and is a crucial safety measure. When turning clockwise, you gently increase spring pressure on the diaphragm, raising the pressure. Remember, counterclockwise turns lower the pressure, so stick with clockwise adjustments for increases. An interlock kit is essential for safely connecting a generator to your home’s electrical panel. Once you’ve achieved the desired setting, secure it with any locking mechanism provided to prevent accidental changes. For camping setups, portable inverter generators often rely on stable propane pressure to run sensitive electronics reliably. Using a 10W-30 viscosity oil in the engine helps maintain smooth operation under varying temperatures. Patience and tiny turns give you precise control without risking stress to your system.
Test for Leaks and Check Flame Stability After Adjustment
Ignite the appliance and observe the burner to check flame consistency. A stable flame remains steady without fluttering, lifting, or pulsing. If you notice instability, it could indicate low or excess pressure or a lingering leak. In such cases, immediately shut off the gas and retest the connections with soap solution. Continuous bubbles at a joint confirm escaping gas, making the soap and water solution a reliable visual indicator for leaks. Persistent flame instability warrants performing another soap test before proceeding further. For continued power outages, a portable power station can keep your gas furnace’s electronic ignition and blower running reliably during pressure adjustments. When selecting backup power, choose a portable generator that matches your furnace’s wattage requirements to ensure stable operation. Never operate the generator while driving, as gas buildup inside the vehicle can create a serious carbon monoxide hazard.
When to Replace Instead of Adjust Your Propane Regulator
You should replace your propane regulator immediately if you notice cracks, heavy rust, pitting around vent ports, or white oxidation and green deposits indicating moisture ingress. Performance issues such as fluctuating pressure, yellow flames, or weak burner output also signal failure that cannot be fixed through adjustments. If you smell propane or hear hissing sounds near the regulator, it’s a clear sign it’s time to replace. Units that have been submerged underwater or show signs of frost are compromised and need to be swapped out right away. Additionally, check the date code—if the regulator is past its expiration date, replacing it is necessary. Since most regulators are sealed units, do not attempt repairs yourself. Always turn off the gas supply, match the regulator’s original pressure rating during installation, and perform a leak test afterward to ensure safety. Knowing how to test your propane regulator safely helps you confirm whether replacement is truly needed before making a purchase.
Confirm You Hit the Right Pressure for Your Appliance
To confirm you’ve set the correct pressure for your appliance, start by checking the appliance data plate—it provides the recommended pressure, usually around 11 inches WC (0.40 psi). Use a low-pressure manometer connected to the regulator’s test port while the gas is flowing. Begin testing at about half the total load to ensure stability before proceeding to full load. Observe the pressure; steady readings mean you’re on track, whereas a significant drop indicates an adjustment is needed. For a full-system check, you can also reference how natural gas generators handle pressure demands in a home backup scenario. A similar principle applies when building an enclosed generator setup, as proper ventilation and pressure checks prevent dangerous gas buildup. Applying the same careful measurement approach used in building a DIY solar panel ensures consistent performance across all gas-powered appliances.
Gently adjust the regulator screw—turn it clockwise to increase pressure and counterclockwise to decrease. Aim for the specified pressure on your data plate, generally 11 inches WC. Make slow, incremental adjustments, then recheck with the manometer. Achieving precise regulation is key to efficient operation, as over- or under-pressure can compromise safety and performance. Once the correct pressure is set, reseal the test port and run the appliance for a few minutes to confirm the pressure remains steady. If it fluctuates or drops quickly, further investigation is required.