Thinking about building your own solar panel kit but unsure where to start? The key is understanding your energy needs and choosing the right components to match your location and usage.
With the right setup, you’ll be able to power your home or cabin efficiently and reliably. Keep reading to learn the step-by-step process and avoid common mistakes along the way.
Calculate Your Power Needs Before Buying a DIY Solar Kit
Start by creating a detailed list of your daily energy consumption for each appliance, device, and light fixture you plan to run on your solar system. For each item, write down its wattage and estimate the hours it will be in use each day. Multiply these two numbers to get the daily watt-hours for that device. Add all these watt-hour totals together to determine your overall daily energy demand. This total is essential because it guides how large your battery bank should be—you need enough storage to power everything overnight and during periods of low sunlight. Next, determine your peak simultaneous load by adding up the wattages of all devices that might operate at once. Be mindful of motor startup surges, which can temporarily draw 2 to 3 times the running wattage, and include this in your calculations. Knowing your peak load ensures your inverter can handle the maximum power demand without shutting down. Finally, add a safety margin of 15% to 25% to your total design. This buffer accounts for wiring and inverter efficiency losses, temperature variations, and future power needs, helping prevent performance issues or shortages. When selecting your system components, also consider the pump flow rate required for any liquid transfer tasks to ensure your solar setup can support all intended applications. Common mistakes in power calculations include ignoring motor startup surges or underestimating efficiency losses, which can lead to costly system failures. To avoid premature battery failure, regularly conduct deep cycle battery testing to monitor state-of-charge and spot reduced capacity before it impacts your solar storage.


【1-Pack DIY 18650 Battery Holders】 Includes two modular storage brackets (2x4 slot each), designed for flat-top 18650 lithium batteries, allowing flexible configuration for energy storage and power applications.

【High Conversion Rate】This 20W solar panel with monocrystalline A+ solar cell has an excellent cell efficiency of 21%-30%. Designed to charge and maintain 12V rechargeable batteries like LiFePO₄, Lithium Ion, AGM, SLA, GEL, EFB, MF, etc. Keep batteries in charged for trailer, tractor, truck, boat, motorcycle, RV, car, lawn mower, water pump, gate opener, electric fence, etc
Pick Solar Panels, Batteries, and an Inverter That Match Your Load
Calculate your daily energy demand and then select components that match that load. Begin by sizing your solar array: divide your daily watt-hours by your local peak-sun-hours, then multiply by system losses such as dirt, shading, or wiring inefficiencies—typically 10 to 20%. Use the wattage of your chosen panels to estimate the number of modules needed, ensuring they can connect to your charge controller and voltage requirements. For wiring, connect panels in series to maximize voltage and minimize current, which helps reduce conductor size and losses. Avoid mixing different panel types, as identical modules will perform more reliably and efficiently. For maintaining battery health during long idle periods, a trickle charger can prevent self-discharge and sulfation. To verify your inverter’s startup capability, refer to a top power inverters buyer’s guide that compares continuous and surge ratings.
Choose batteries based on usable capacity rather than their rated capacity. Lithium iron phosphate cells allow deeper discharges (up to 80-90%), extending their lifespan, while lead-acid batteries typically need shallower discharges (around 50%) to avoid damage. Match the battery bank voltage—most commonly 12V, 24V, or 48V—to your inverter and charge controller to ensure compatibility. Include additional autonomy days—usually 2 to 5—for periods of overcast weather or low sunlight.
Finally, select an inverter with a continuous power rating that covers all your expected load plus at least 20% headroom. Confirm that its surge capability can handle starting motors or other devices with high startup currents. For example, a 100W panel can power small loads like a LED light and phone charger, but if you need to run a refrigerator, a starting-watts versus running-watts breakdown helps ensure the inverter can handle initial motor startup without tripping. Proper matching of these components ensures your system operates efficiently, reliably, and with room to grow.

Long Cycle Life, 3000+ Cycles. 12 LiFePO4 battery pack is constructed from High Quality Lithium Iron phosphate battery cells. DC 5521 port: Inner Positive(+), Outer Negative(-).

【Exceptional Performance】The Kgioo 12V 7Ah lithium battery embodies deep-cycle battery technology, delivering unmatched performance and battery life. The Kgioo 12V 7Ah LiFePO4 battery provides 4,000 cycles and a lifespan of up to 10 years.

【Superior Performance】: Lithium iron phosphate battery has high energy density, Long cycle life, Good safety performance, No memory effect, etc. NERMAK LiFePO4 battery has built-in 100A BMS protection to prevent overcharge, Over-discharge, Over-current and short circuit, and excessive low self-discharge rate ensuring up to 1-year maintenance-free storage.
Gather Tools, Safety Gear, and Check Local Permits First
Gathering all necessary tools and safety gear first is essential before starting any installation. Ensure you have a power drill, measuring tools, wire strippers, and conduit-bending tools ready. A ladder rated appropriately for roof access is also necessary. Checking local permits beforehand is critical; most installations require a building permit for mounting, an electrical permit for wiring, and possibly a utility interconnection agreement for grid-tied systems. Prepare your site plan, one-line diagram, and product specifications for submission. Some jurisdictions may offer streamlined solar permits, but others may require structural or fire department review. Securing all approvals before you begin prevents costly delays and legal issues. For those planning off-grid use, selecting a high-capacity battery system like the top portable solar generators ensures reliable power storage during emergencies. Equipping yourself with the right safety gear—such as ANSI Z87.1 safety glasses, a fall-protection harness for heights over 6 feet, a hard hat, slip-resistant boots, insulated gloves, and arc-rated clothing—ensures safety and compliance. Adding a whole house surge protector is worth considering to safeguard your solar system from voltage spikes. For quieter operation and cleaner power output, pairing your system with an inverter for portable generator is an effective solution. Proper preparation is the best defense against dangerous shortcuts and inspection failures.

Knit: 13-gauge HPPE/steel blend provides 360 degree cut resistance

The cable clamp is designed to effectively prevent PV modules from damage caused by strikes and extreme weather conditions; This feature makes this product ideal for areas prone to strikes

Easy Rail Installation: The SPD Protective Device is engineered for effortless installation with its 2P rail design. This intuitive mounting system allows for quick setup, making it easier for electricians and technicians to install and maintain. Say goodbye to complicated installations that waste time and resources; with this device, you’ll be ready to protect your photovoltaic systems in no time
Mount Your DIY Solar Panels on the Roof or Ground
Mounting your solar panels on the roof or on the ground provides two different approaches, each with its own advantages and considerations. Roof mounting utilizes your existing roof structure, which can save on upfront costs since no additional foundation is needed. However, it limits you to the roof’s pitch and orientation, meaning you may not achieve optimal panel angle or sunlight exposure. In the northern hemisphere, facing panels south maximizes sunlight capture, but you’ll need to measure your roof’s pitch to ensure proper placement. Leave at least a two-inch ventilation gap behind the panels to prevent overheating and improve performance. Portrait mounting on the roof can also help with snow shedding, preventing snow buildup that reduces efficiency during winter. For a detailed comparison, you can review the top mount options in our earlier guide. For those using propane generators as backup, understanding that a 100 lb propane tank holds about 23.6 gallons of fuel can help you plan for extended power needs.
Ground mounting offers greater flexibility to optimize tilt and airflow, which can boost energy production by 10 to 25 percent per panel. Setting the tilt near your latitude angle allows for good year-round performance, with seasonal adjustments for winter months enhancing winter energy output. Building a ground mount requires a dedicated foundation, such as screw piles or concrete footings, and trenching cables from the panels to your building. This setup typically involves more labor and materials, increasing costs by about 10 to 20 percent compared to roof mounts. Ground mounts are easier to access for cleaning and maintenance but require more space. Your choice ultimately depends on available space, budget, and access needs. A standby generator could also serve as a backup power source during prolonged outages when solar production is low.

[Roof Solar Mounting Brackets] Suitable for metal roof, shingle roof. 10 set of solar mounting brackets can hold up to 4 solar panels.Instead of the very short 4” mini rails, we offer 10x 6” rails, which are 50% longer and more flexible. -- Please notice that this solar panel mounting brackets is compatible to solar panel thickness: 1.37-1.4 inches.

Product Includes: a kit containing 8 L-Foot mounts with flashing, complete with bolts and hardware, specifically designed for asphalt shingle and composite tile roofs, compatible with most common photovoltaic rails, meeting the installation needs of residential solar modules
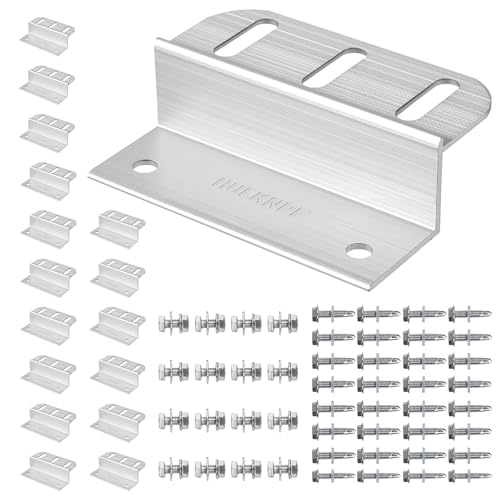
Durable & Wind-Resistant Build: Crafted from corrosion-resistant aluminum alloy, these heavy-duty Z brackets provide long-lasting, stable performance and withstand high winds for outdoor solar installations.
Wire Your DIY Solar Kit: Panels to Charge Controller to Battery Bank
After mounting the panels, connect them to the charge controller first, then link the controller to the battery bank. Always match wire polarity exactly—positive to positive, negative to negative—because reversing polarity can damage the controller. Use a multimeter to verify the connections before making final fittings.
Select wire gauge based on the controller’s rated output current multiplied by 1.25. For example, a 40A controller requires at least 8 AWG copper wire. Longer cable runs increase voltage drop, so heavier gauge wire is necessary for extended distances. Keep the wire between the controller and the batteries as short as possible for optimal charging accuracy. For systems using a backup generator like the Predator 3500, proper oil volume ensures the generator runs reliably when charging the battery bank. A charge controller prevents overcharging the battery by regulating the voltage and current from the solar panels.
Install a DC-rated fuse on the positive wire between the controller and the battery. Place it within 7 inches of the battery terminal. Choose a fuse rated at the controller’s maximum charge current plus a 25 percent safety margin—such as a 50A fuse for a 40A controller. Make sure the fuse’s current rating does not exceed the maximum ampacity of the cable. A smart charger can also automatically adjust charging stages to extend battery lifespan.
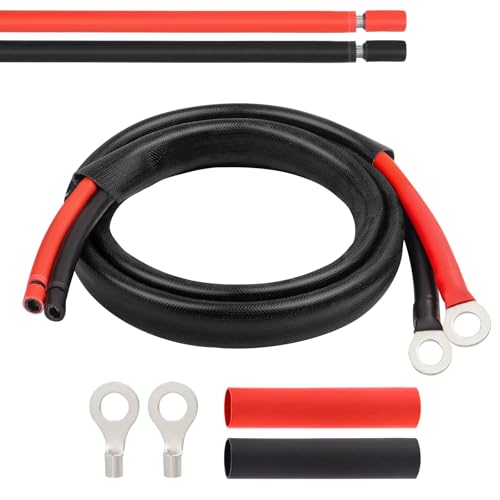
10AWG Tinned Copper Wire -- MOOKEERF solar battery cable is made of larger diameter 10AWG tinned copper wire which is minimize power loss in solar panel systems, the inner conductor consists of 84 tin-plated copper, well constructed and good conductive.

Two cables with hard plastic Female & Male connecters at one end and bare on the other end.

Two cables with hard plastic Female & Male connecters at one end and bare on the other end.
Connect the Inverter and Test Your DIY Solar Kit Circuit
Turn the inverter off and disconnect the battery before testing. Measure resistance between neutral and ground at the AC output using a multimeter set to resistance mode. A proper bond should show a very low resistance, typically close to zero ohms, confirming effective grounding. Inspect every termination point for tightness and ensure insulation is intact to prevent shorts or accidental contact. This process of checking output stage continuity mirrors the method used to verify healthy inverter output wiring in troubleshooting scenarios. While this electrical work is unrelated to tax filing, note that a whole house generator installation may qualify for a federal tax credit under certain energy-efficiency programs. To protect your system from long-term fuel degradation, consider using a fuel stabilizer designed to prevent ethanol-related corrosion. For backup fuel stored for the generator, remember that kerosene can expire due to microbial growth and oxidation, so proper storage and rotation are critical.
Reconnect the battery and then turn the inverter back on. Measure the AC output voltage between hot and neutral, hot and ground, and neutral and ground. The voltage between hot and neutral should match your inverter’s rated output, usually around 120V or 230V depending on your region. The voltage between hot and ground, and neutral and ground, should be close to zero, indicating proper grounding. Once confirmed, gradually apply a small load to the system, such as a test light or a low-wattage appliance, while watching for any voltage sag or erratic behavior. This step ensures the inverter can handle the load without issues.
Common DIY Solar Kit Mistakes and How to Maintain It
To keep your DIY solar kit operating efficiently, avoid common mistakes like shading, wiring faults, and improper cleaning. Shade from trees or chimneys can reduce your system’s output significantly, so trim or remove these obstructions before installation. Check all wiring connections carefully—loose MC4 connectors or poor grounding can cause fires or drops in energy production. Never use pressure washers or harsh chemicals to clean panels; instead, clean early in the morning or on cool days with a soft, damp cloth to prevent scratching the glass. Conduct annual inspections of mounts and wiring, especially after storms or severe weather. Monitor your system’s output every month—sudden drops can indicate issues needing attention. Keep a cleaning schedule to stay consistent. To avoid roof leaks, ensure flashing is sealed correctly during installation. Always follow the manufacturer’s shutdown procedures when performing maintenance and avoid walking directly on the panels to prevent damage. For those who also maintain a motorcycle battery, a battery tender for Harley-Davidson can help keep it charged during long periods of solar power storage. Adding a stabilizer for gas to stored fuel can prevent it from degrading over time if you use a generator for backup power.