Ever find yourself with a dead car battery and no charger in sight? Knowing how to jump-start your car using simple methods can be a real lifesaver.
In this quick guide, you’ll learn the basics of connecting jumper cables to get your car running again without special equipment.
Keep reading to discover how to do it safely and effectively.
Stay Safe: Key Rules Before Connecting Any Cables
First, identify the battery’s polarity to avoid electrical mishaps. The positive terminal usually has a red cap or a “+” mark, while the negative terminal is black with a “-”. Ensure the cable insulation is intact to prevent accidental arcing. Always wear safety glasses and insulated gloves because acid splashes or sparks can cause serious injury. Power down the vehicle completely and remove the keys before handling the battery. Conduct a battery terminal cleaning to remove corrosion, as corroded terminals increase resistance and fire risk. When connecting the cables, attach the positive cable first, followed by the negative. After securing each clamp, give it a slight tug to confirm a solid connection. Never let the clamps touch each other or any metal surface, and always work in a well-ventilated area to prevent the buildup of flammable battery gases. Always disconnect the negative cable first when removing the cables to avoid sparks and potential damage to the electrical system. If using a portable generator as a power source, ensure it is equipped with a high-quality inverter to provide stable, clean power for safe battery charging. For long-term battery health, consider the charging profile that matches the battery type, similar to how marine chargers adjust to deep-cycle batteries. When operating a generator for this purpose, also select a synthetic blend oil to reduce engine wear and maintain performance during extended use.
Jump-Start With Jumper Cables and a Donor Vehicle
To jump-start your dead battery using jumper cables and a donor vehicle, follow these steps precisely. First, park the donor vehicle close to yours, making sure the vehicles do not touch. Turn off both engines and all electrical devices. Set both vehicles in park with the parking brakes engaged.
Next, connect the jumper cables starting with the red clamps. Attach one red clamp to the positive terminal of your dead battery, then connect the other red clamp to the positive terminal of the donor vehicle’s battery. Then, take the black clamp and connect it to the negative terminal of the donor vehicle’s battery. Finally, attach the remaining black clamp to an unpainted metal surface on your engine block—avoid connecting it directly to the negative terminal of your dead battery to reduce the risk of sparks. Unlike the diesel fuel options for generators, which vary in cetane rating and sulfur content, a car battery relies on a clean electrical connection for safety. For protection against sudden power spikes, a joule surge rating can help safeguard sensitive electronics during generator use. While kerosene can degrade over time and may require proper storage containers to remain usable, a car battery deals with chemical deterioration that is reversed by charging.
Start the donor vehicle and let it idle for 1 to 5 minutes. This allows the donor to transfer charge to your dead battery. Attempt to start your vehicle. If it does not start, wait a few more minutes and try again. Once your engine runs, let it idle for a few minutes to help stabilize the battery’s charge.
When finishing, remove the cables in the reverse order: disconnect the black clamp from your engine block first, then the black clamp from the donor vehicle. Next, remove the red clamps from the batteries. To help your battery recover fully, drive your vehicle for about 15 minutes, which allows your alternator to boost the battery’s health and restore some charging capacity. Confirm your vehicle can restart independently before traveling to ensure it is reliable.
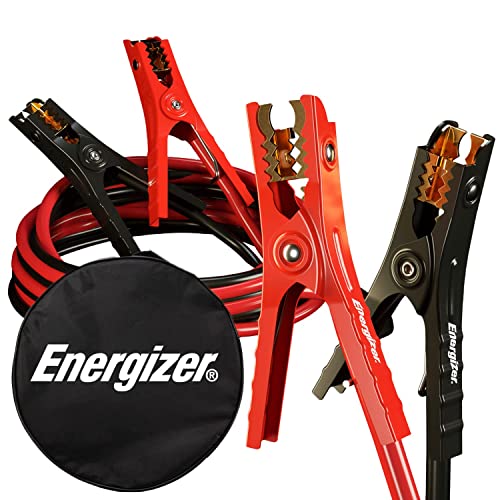
ENERGIZER 16 FEET JUMPER CABLES - 6 Gauge, 16 FT booster battery jumper cables for jump starting a dead or weak battery. Ideal for trucks, SUVs, full-size cars, mid-size cars and small/compact cars
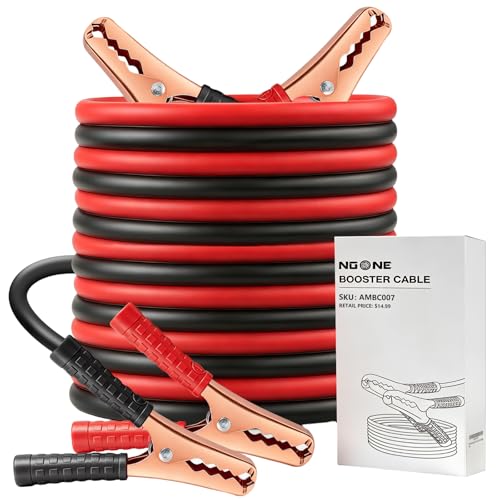
UNIVERSAL FITMENTS :NOONE 10 FT car jumper cables support 200A peak current for jumping start 12/24V car battery. So NOONE booster cables are suitable for your vehicles with up to 3.0 L Gas Engines
ENERGIZER 16 FEET JUMPER CABLES - 4 Gauge, 16 FT booster battery jumper cables for jump starting a dead or weak battery. Ideal for trucks, SUVs, full-size cars, mid-size cars and small/compact cars
Use a Portable Jump Starter for a Quick Boost
Using a portable jump starter provides a quick boost to your car’s battery without needing another vehicle. It delivers a short burst of power to crank a weak battery but doesn’t fully recharge it. To avoid sparks caused by hydrogen gas formation, connect the red clamp to the positive terminal first, then attach the black clamp to a metal ground away from the battery. Only turn on the jump starter after both clamps are securely connected. Crank the engine briefly; prolonged attempts can overheat the device. If the engine starts, disconnect the black clamp first, then the red. Keep the engine running for 15 to 30 minutes so the alternator can help recharge the battery. Remember, a jump starter supplies direct current, not alternating current, making it an emergency tool rather than a charger. Recharge the unit after each use to ensure it’s ready for the next time. For comparison, a 3500 watt generator can run essential household appliances using alternating current, unlike the direct current from a jump starter. A natural gas backup generator is a more robust solution for extended power outages, providing reliable, whole-home power without needing to refuel. Frequent deep discharges can accelerate battery sulfation, reducing the battery’s long-term capacity and lifespan.

【High-Performance Car Jump Starter】Driven by stable 4000A, the jump box for car battery portable can easily restart 12V dead vehicles up to 8.0L gas & 6.5L diesel engines in seconds even at -4℉~140℉. Support more than 1000+ jumps and easier than asking help from others or roadside service.
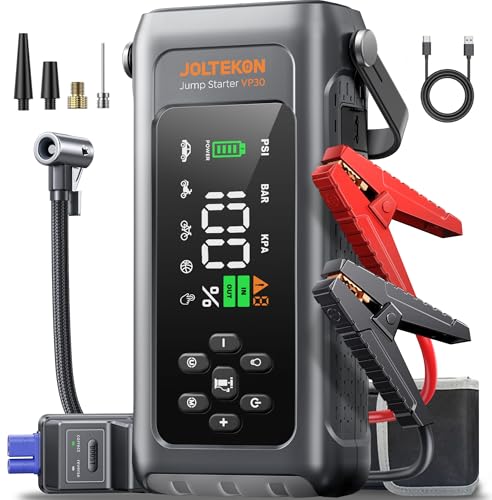
【8-IN-1 CAR BATTERY JUMP STARTER】This 12V Jump Box highlights highly integrated advanced functions but is more portable, transcending general battery booster. It's a portable car jump starter, tire pump, pressure gauge, portable power bank, flashlight, SOS signal, white strobe, red strobe as triangle warning light. Portable, versatile and must-have kit, your ultimate companion for emgencies, adventures and daily use!

【5000A portable jump starter for car】Conquer dead batteries in just 1 second. Ideal for car, truck, motorcycle, lawnmower, boat, and more. Built-in Force Start tech inside the smart clamps delivers strong power to jump-start cars with completely drained 0V batteries. Whether you’re rushing to work, heading out on family trips, or stuck with a dead battery on frigid winter mornings, this jump starter gets your vehicle back up and running in no time.
Charge a Dead Battery Slowly Using a Second Battery
To charge a dead battery slowly using a second battery, start with voltage matching—both must be 12V to ensure safety. Connect the positive terminal of the donor battery to the positive terminal of the dead battery first, then attach the negative cable to a metal, unpainted ground on the vehicle with the dead battery, rather than its terminal. This parallel connection allows current to flow gradually, taking several hours to transfer a meaningful charge. Use a fully charged donor battery for best results; a weak or partially charged one may not transfer enough power. Battery capacity also matters—matching or similar capacities help prevent damage and make charging more controlled. After connecting, let the setup sit for several minutes before attempting to start the vehicle. If the donor vehicle is running during this process, it helps maintain flow and prevent overloading. Remember that this method primarily provides cranking power rather than a full recharge; after the vehicle starts, run it for at least 15 to 30 minutes to help stabilize the battery. For long-term storage, consider using a fuel stabilizer to protect the generator’s fuel system. Always be cautious with wiring to avoid sparks, damage, or injury. Unlike a kerosene heater, which requires proper ventilation to prevent dangerous indoor air pollution, this battery charging method does not produce toxic fumes. For similar equipment maintenance, using a high-quality 10W-30 oil helps ensure your generator runs smoothly and reliably.

5000A Powerful Emergency Jump Starter: Start your vehicle in seconds with maximum current of up to 5000A. This portable jump starter with jumper cables delivers reliable performance for 12V vehicles up to 8.0L gasoline and 6.0L diesel engines. It works even in extreme temperatures from -4°F to 140°F, making it suitable for cars, SUVs, pickup trucks, and more—your dependable roadside emergency backup anytime, anywhere
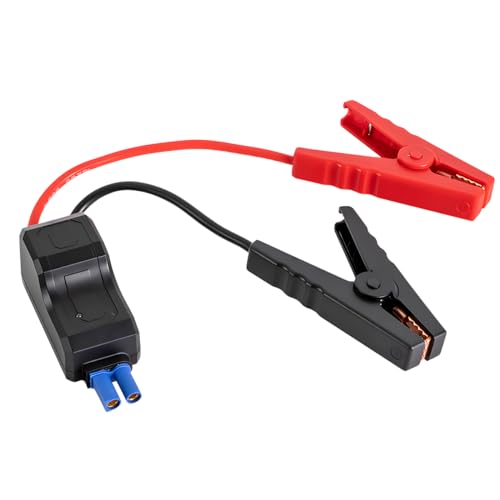
【Five Fold Protection】: This product can be anti-reverse charging, anti-over-discharging, anti-over-current, anti-reverse connection, anti-short circuit. Intelligent alarm system, safe and durable, built-in small wire to stabilize the current. Used to connect (car emergency jump starter and car battery), start the car, can prevent the positive and negative poles of the power supply collision and thus lead to short-circuit situation, high safety factor.

✅【High-Performance Jumper Cables】These AWELTEC Jumper Cables feature an 8-gauge design for superior conductivity, ensuring reliable performance as a battery booster cable even in extreme conditions.
Use a Solar Charger for Long-Term Battery Maintenance
Using a solar charger for long-term battery maintenance is an effective way to keep your battery in good condition without frequent manual intervention. It delivers a steady, low-amp charge that offsets natural self-discharge and parasitic draws from alarms or clocks. To maximize performance, focus on solar panel placement by positioning it in direct sunlight, such as on your dashboard or windshield. This ensures the panel receives the most light, boosting output and maintaining your battery’s health.
This method is ideal for seasonal vehicles or cars stored for extended periods. It prevents sulfation—a buildup of lead sulfate crystals that can reduce battery capacity—without risking overcharging, as the built-in smart MPPT charge controller achieves up to 99% tracking efficiency. Keep the panel connected during storage and check it weekly to confirm it’s receiving sufficient light. Remember, solar maintenance units work best on batteries that are already reasonably charged, not on dead or deeply discharged ones. Using a solar charger for long-term care helps your battery stay healthy with minimal effort.
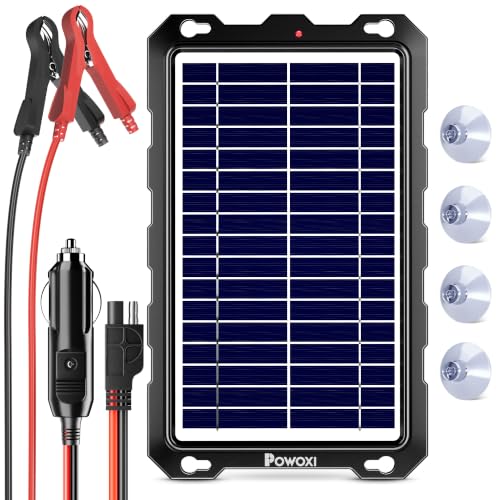
Upgrade Intelligent Charge Controller: Built-in internal protection system and smart fast charging Cooperate with Quality solar silicon material ensures high conversion and stable output the solar panel's energy conversion efficiency to 25-30%

【High-Efficiency Monocrystalline Core 】 Precision-engineered with premium monocrystalline cells delivering 20%-25% photoelectric conversion efficiency (STC), outperforming polycrystalline and amorphous counterparts in energy yield under equivalent conditions.
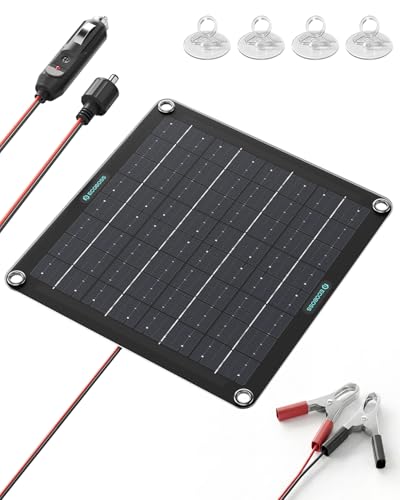
Safe Solar Trickle Charging No Overcharge: This 10W monocrystalline solar panel uses gentle trickle charging to protect battery health. Built-in blocking diode and intelligent protection system prevent overcharging, reverse current, short circuit, overload, and overheating - safe even when used continuously outdoors
When You Need Professional Battery Help
If you notice signs of internal damage or acid exposure, do not attempt to handle the battery yourself. Corrosion around the terminals, a swollen or cracked case, and a rotten-egg smell all indicate serious issues that require professional attention. Furthermore, if your battery is nearing 3 to 5 years of age and keeps failing, it’s time to have a professional test the alternator and starter to determine if they are contributing to the problems. Symptoms like dimming headlights, slow engine cranking, or a persistent warning light on your dashboard suggest deeper electrical problems beyond a dead cell. If you experience multiple jump-start failures or notice sparks, excessive heat, or leaks while working on the battery, seek roadside assistance immediately. Handling these issues without proper training or equipment risks explosions or acid burns, so it’s safest to call a mechanic for diagnosis and replacement. For long-term battery maintenance, a battery trickle charger delivers a low, steady current to keep the battery topped off without overcharging, which prevents the deep discharge that often leads to terminal damage and internal plate sulfation. Similarly, a propane generator offers reliable backup power for home appliances during extended outages.

Charger, Maintainer & Desulfator - An all-weather battery charger, battery maintainer, trickle charger, and battery desulfator. Perfect for charging and maintaining all 12-volt lead-acid, flooded or sealed maintenance free batteries (AGM and gel cell).

【THE PERFECT WINTER BATTERY CHARGING SOLUTION】Corebox automatic battery trickle charger with 8 charging protections is an all-in-one solution: charger, maintainer, trickle charger and desulfator. It ensures perfect maintenance of battery charging safety during the winter or vacation months, avoiding battery failure in advance. Temp compensation in hot or cold climates, reverse protection, cooling system, overcurrent, fireproof material, overcharge, short circuit.

Adaptive Smart Charging: Our battery maintainer adapts to the needs of your 12V battery, ensuring optimal charging and extending battery life. Ideal for Automotive, Motorcycle, and Lawn Mowers.