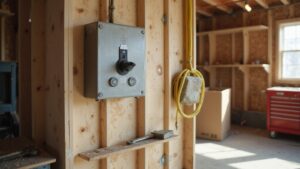
If your generator is louder than you’d like, you’re probably wondering how to quiet it down.
The good news is that most of the noise comes from exhausts and vibrations, which can be tackled with simple DIY fixes. By managing these key sources, you can significantly cut the sound and make your generator run much quieter.
Keep reading for the step-by-step tips to cut noise effectively.
Why Exhaust and Vibration Alone Cut Noise the Most
Exhaust and vibration alone cut noise the most because they address the primary sources of loudness in a generator. The exhaust system is usually the loudest component, reaching 120–130 dB without a silencer. This high volume results from exhaust resonance and pulsating airflow. Using a properly matched silencer can reduce this noise by 15–35 dB, making a significant difference. Using a high-quality 10W-30 oil helps ensure the engine runs smoothly, reducing mechanical clatter that can add to overall noise. For whole-house protection, consider a surge protector that guards against electrical spikes. A surge protective device works by diverting excess voltage away from connected equipment, preventing damage from transient spikes.
Vibration isolation is the second major contributor to noise. Mechanical movement travels through floors and walls as structure-borne noise, increasing the perceived loudness even if the exhaust noise is reduced. Anti-vibration mounts and flexible joints prevent this energy from re-radiating as sound. Soft interfaces like neoprene pads help absorb vibrations, reducing resonance buildup in panels and surfaces.
Together, these two strategies tackle both airborne and structure-borne noise paths. They can deliver double-digit decibel reductions, providing far more effective noise control than cosmetic fixes. Prioritizing exhaust and vibration isolation yields the most noticeable noise reduction for your generator.

[Attention]: (If the connector doesn’t fit, contact us for customization) The generator exhaust extension kit must be used in a generator shed generator quiet box....
3 Simple DIY Fixes That Take Under 10 Minutes
You can reduce generator noise in under 10 minutes with three simple adjustments. First, increase the distance between the generator and your occupied space; doubling the distance can cut noise levels by about 6 decibels. Placing the unit on grass or dirt instead of concrete also helps because soft ground absorbs some of the transmitted rumble. Additionally, vibration-absorbing surfaces like rubber mats under the generator can further dampen vibrations and reduce overall noise. Understanding the typical lifespan of standby generators also helps you plan for long-term maintenance to keep the unit running quietly for years. For even more control, consider using a car lighter power inverter to run smaller devices without the generator running at full load. Performing a load test on the battery can also ensure the generator starts reliably and operates efficiently.
Next, redirect the exhaust outlet so it points away from you and your listening area. Rotating it upward or outward can provide an immediate, low-cost noise reduction. Finally, set up a temporary angled barrier between the generator and the area where you want less noise. Make sure to keep airflow open to prevent overheating. Combining this distance, ground material, exhaust direction, and a quick deflector can make a noticeable difference in noise levels without any tools or major effort.
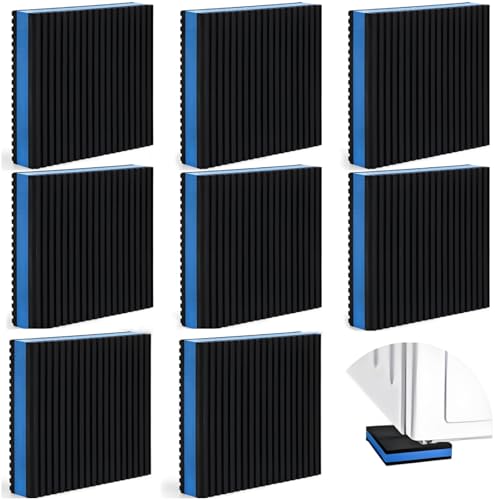
Package Info: You will receive 8 pieces anti-vibration pads, each measures 4''L x 4''W x 7/8''Th. Sufficient quantity and moderate size bring great service for your daily life.

[Great Noise Cancellation]:If you are often annoyed by the noise and vibration from some electrical appliances or machine equipment, this vibration isolation pads can't be missed. The anti vibration pads has remarkable effect on noise reduction and vibration isolation, especially for the washing machine upstairs or the air compressor in the garage, it can definitely give you a surprise!
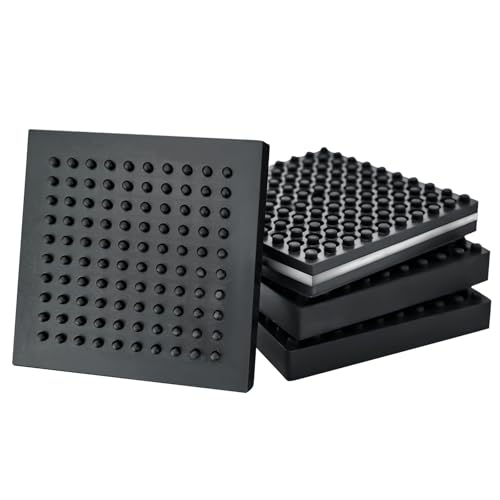
【SPECIFICATIONS】: Size: 4 x 4 x 0.8 inches, pack of 4; Weight: 0.52 pounds per mat; Material: Rubber with embedded steel plate; Max Load: 440 pounds per mat. Natural rubber is the best choice for vibration damping applications due to its superior elasticity
Build a Plywood Sound Baffle That Works
Build a lean-to shape with four sheets of roughly 4 feet wide by 3 feet tall plywood, adjusted to fit your unit. Keep the top open and ensure intake and exhaust paths are unobstructed. Angling the panels wider at the base directs noise downward rather than outward, reducing sound transmission. For extended camping trips, a portable inverter generator can be a much quieter starting point than a conventional model. Reviewing top picks for portable generators can help you find the most suitable option for your needs. Always consult a licensed electrician for any electrical work related to generator connections, as improper wiring poses serious safety risks.
Choose ¾-inch plywood for durability and strength, and use 2×4 framing to support the angle structure. Secure corners with L-brackets to prevent movement and rattling. Inside, add insulation like rockwool or acoustic foam for enhanced noise absorption. Tightening panels with screws and sealing seams stiffens the structure and minimizes rattles from vibrations.
Testing your setup under load is essential. You should see a significant reduction—often 10 decibels or more—in noise level. Remember, never fully box the generator in; maintaining open pathways ensures proper ventilation and prevents heat buildup.

Superior Acoustic Performance: It is designed to provide excellent noise-cancellation capabilities, making it ideal for use in homes, offices, studios, and other spaces where acoustic quality is a priority

The sound effects, suitable for studio and KTV

Acoustic Speaker Baffles
Best Materials for a Full Soundproof Enclosure
Building an effective full soundproof enclosure requires combining several key materials. Start with mass-loaded vinyl (MLV) as your primary barrier because it is dense and flexible, effectively blocking airborne noise when all seams are properly sealed. Pair MLV with rigid wall panels made from MDF or plywood, which add mass and structural support to the enclosure. For interior sound absorption, use mineral wool or rockwool; these materials provide broad-frequency sound absorption and are also fire-resistant. To address vibration transmission, apply viscoelastic compounds like Green Glue between layers of wall material to transform vibrations into heat. Additionally, rubber mounts help isolate the generator from the enclosure walls. This layered approach—outer shell, dense barrier, and internal absorber—can typically reduce noise levels by 10 to 20 decibels. For pairing the enclosure with a reliable power source, many builders select a hybrid solar inverter to manage battery charging and solar input efficiently. For the enclosure’s electrical components, users can consult reviews comparing best charging car batteries to ensure reliable power delivery. When selecting the inverter for your generator setup, consider a model that delivers clean power output to protect sensitive electronics.

Experience the next level of sound control with our advanced formula, completely re-engineered for superior durability, tear resistance, and a professional finish. The Stronger, Smarter Sound Barrier.

High-Efficiency Sound sound barrier quiet wall with a proven 27 STC rating - 1/8 inch thick dense rubberlike material - 1 Pound per Square foot.
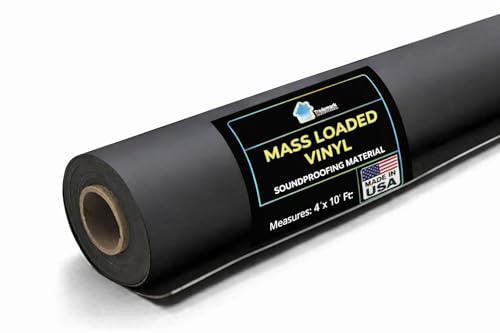
High-Efficiency Sound sound barrier quiet wall with a proven 27 STC rating - 1/8 inch thick dense rubberlike material - 1 Pound per Square feet.
Ventilation Tips to Prevent Overheating in a Quiet Box
To prevent overheating in your quiet box, ensure adequate ventilation airflow. Aim for at least one full air change per minute inside the enclosure. For small portable generators, this typically means 200 to 400 CFM (cubic feet per minute), while larger standby units may require 800 to more than 1,200 CFM. When ambient temperatures rise above 25°C, increase airflow by 3-5% for every additional 10°C to compensate for the higher heat load. For critical applications, consider using ultra-low sulfur diesel to reduce emissions and soot buildup, which can clog filters and restrict airflow over time. Position intake vents low on the enclosure to draw in cooler air and exhaust vents high to release rising hot air. Keep these openings separated to avoid hot air recirculation, which can lead to inefficient cooling. Regularly clean radiator surfaces and sealed discharge paths to maintain optimal heat dissipation efficiency. Don’t overlook the importance of providing combustion air; your generator needs a steady supply of fresh air to operate safely and prevent overheating. Similarly, store any fuel supplies in a well-ventilated area away from the enclosure to avoid vapor accumulation. Always pair your ventilation setup with a heavy-duty extension cord rated for the generator’s full amperage draw to avoid voltage drop and heat buildup along the power path.
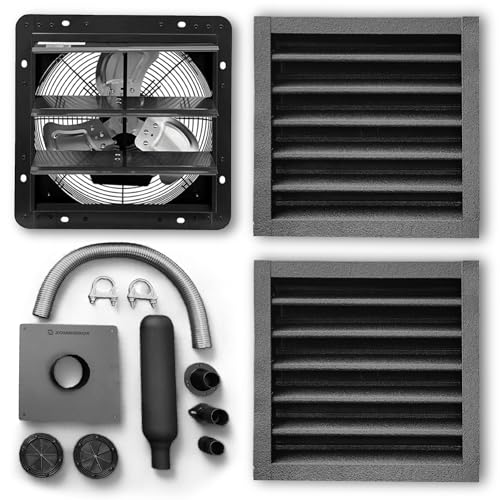
COMPLETE CLIMATE CONTROL SYSTEM: The all-in-one solution for building or upgrading your DIY generator enclosure. This comprehensive kit solves the two biggest problems with outdoor generator sheds: overheating and carbon monoxide buildup. Includes active cooling, passive intake, safe exhaust routing, and cable management

【Exhaust Odors Smoke and Dust】- Effectively discharge smoke or odor inside the 3D printer protective cover, allowing you to enjoy the process of creating 3D printing works more
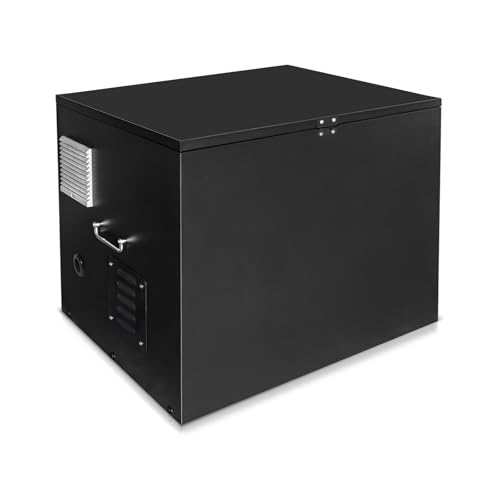
【Premium Steel Construction】- Crafted from heavy-gauge steel with black powder-coating, this enclosure offers superior durability and weather resistance for long-term outdoor protection
Step-by-Step Guide to Building the DIY Enclosure
Measure your generator’s length, width, and height accurately. Add at least 3 to 6 inches of clearance on all sides to ensure proper airflow and easy access. Sketch a rectangular box that fits these dimensions, then mark spots for vents, an access door, and exhaust routing. Use 2×2 or 2×4 lumber for the frame, and ½-inch plywood for the panels.
Cut each frame piece precisely to your measurements, then assemble them square using L-brackets for stability. Secure the panels with deck screws, ensuring everything fits tightly. To reduce noise, line the interior with mass-loaded vinyl or acoustic foam, which dampens sound transmission. Attach a hinged front door to allow for convenient fueling and maintenance access.
Seal all seams thoroughly with caulk to weatherproof the enclosure. Finish by applying paint or external sealant for extra protection. Run safety checks before use to verify proper ventilation and fuel vapor routing. Elevate the entire box on a sturdy base to prevent water infiltration and keep it dry. For vibration reduction, mount the generator on rubber isolation pads inside the enclosure, preventing noise and movement from transmitted vibrations. Double-check the fit before fastening all components fully, avoiding contact points that could cause rubbing or vibration sounds. Also verify that any exposed wiring and fitting details within the enclosure are secured and isolated from moisture to prevent short circuits. When designing the enclosure, avoid plugging a power strip into a surge protector inside it, as this can create a fire hazard due to overload.
How Much Quieter Will Your DIY Generator Box Be?
A well-built DIY enclosure can reduce your generator’s noise by about 10 to 20 decibels, resulting in a noticeable drop in perceived loudness. This level of sound reduction can make a 95 dB generator seem roughly half as loud, bringing it down to around 75 to 85 dB. Achieving this involves adding thicker acoustic foam, sealing all seams tightly, and installing baffled vents to control airflow and sound escape. Protecting your electrical wiring inside the box from moisture and vibration is crucial; use proper weatherproofing techniques such as sealant on all joints and a weather-resistant exterior shell. Ventilation design is also essential—undersized vents risk overheating, while unbaffled openings can leak sound. The actual reduction you get depends on the quality of your build, but with 2 to 4 inches of acoustic foam, you can expect a reduction of around 10 to 15 dB. This provides a significant improvement in noise control without the need for commercial-grade enclosures.
5 Mistakes That Ruin Generator Noise Reduction Projects
Ignoring vibration isolation is a critical mistake that can turn your quiet generator project into a noisy and unstable setup. Vibration transfer through the frame can transmit noise directly into the surrounding structure, making your enclosure much louder than desired. Using only generic rubber pads may not provide sufficient damping, especially on rooftop or mobile installations, where oscillations are more pronounced. In these cases, spring isolators or other specialized mounting solutions are necessary to effectively reduce transmitted vibrations. Additionally, ensure that your exhaust and fuel lines are not rigidly connected to the enclosure; otherwise, they can create pathways for vibration and noise. Proper vibration isolation helps maintain quieter operation, prevents structural issues, and prolongs equipment life.
Test Your Generator’s Noise Level After Each Fix
To reliably test your generator’s noise level after each fix, standardize your testing procedure. Measure from the same distance, typically 7 meters, at a consistent height and angle. Record ambient noise levels before starting the generator to establish a baseline. Use an A-weighted decibel meter (dB(A)) to measure sound from multiple sides of the generator while it’s running at normal load. After applying noise insulation, re-test immediately to gauge effectiveness; expect around a 6 dB reduction if you effectively double the distance in open conditions. For vibration damping improvements, compare the new readings against your baseline to track small gains, which can accumulate over time. Make sure to log the testing date, weather conditions, and the meter type used for each measurement. Repeat the testing process after any major repairs or modifications, like enclosure work or isolator adjustments. Once your noise level reaches your desired target, document that level as your new baseline for future upgrades.