Using a Scepter gas can safely and efficiently can seem tricky at first, especially if you’re unsure about ventilating it properly. The key steps involve checking for damage, venting the can, and controlling the flow of fuel with child safety features.
Once you get the hang of it, pouring gas becomes quick and hassle-free. Keep reading for a simple, step-by-step guide to mastering your Scepter can.
What Type of Scepter Gas Can Do You Have?
Identifying your Scepter gas can starts with checking for the “SmartControl” label. This indicates a modern consumer model featuring a squeeze-controlled spout and a flame mitigation device for safety. Look for a child safety lock, which is crucial for secure fuel storage and preventing accidental spills or access. Fuel-specific labels are also key: red typically signals gasoline, while yellow indicates diesel. Be aware that military-style cans lack these consumer spout features and safety labels. Sizes vary, with 1-gallon, 2-gallon, and 5-gallon options being common. The capacity is usually printed on the can or packaging, providing a quick and reliable way to identify your can’s size and suitability for your needs. For those who also store fuel in propane tanks, a full 20-pound propane tank typically weighs around 36 pounds when filled with 4.6 gallons of propane. To keep your generator running smoothly, always use the correct 10W-30 oil for your engine type.
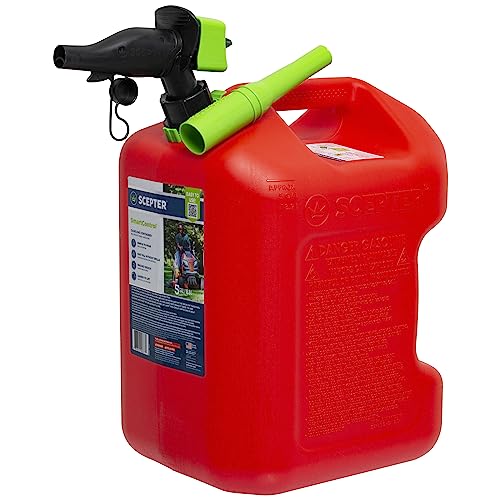
EASY TO POUR GAS CAN – Amazon exclusive, 5-gallon fuel container for easy refilling of lawnmowers, chainsaws, yard tools, recreational vehicles, ATVs, motorcycles, and other gas-powered equipment

COMPATIBILITY: This gas can accessory works with all 1 gallon, 2 gallon and 5 gallon Scepter portable fuel containers, offering wide-ranging compatibility
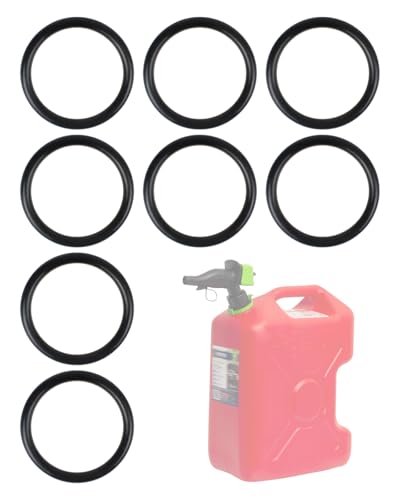
【Compatible with Scepter SmartControl】Compatible with Scepter SmartControl spouts used on fuel cans, providing a secure seal for gas, diesel, and kerosene containers. Intended as a replacement option for worn or degraded gas can gaskets
How to Use an Older Scepter Gas Can Spout
To use an older Scepter gas can spout, you need to approach its mechanism differently from the newer SmartControl models. Most older cans feature a rigid or flexible screw-in spout rather than a push-button style. Begin by inspecting the spout’s sealing parts, such as the O-ring and collar, for cracks, wear, or damage. A compromised seal can lead to leaks. Leaks often indicate that the O-ring has suffered degradation and requires immediate replacement to restore sealing capability. When storing the gas can, choose a well-ventilated area away from appliances and heat sources, similar to approved propane tank storage practices for safety. Understanding the specific heat sources that can affect fuel stability is also important for safe storage. A similar focus on component integrity ensures a DIY solar panel system remains safe and leak-free during setup.
Next, locate the locking tab—this might be a squeeze-and-slide or push-to-release type. Depress or slide this lock before attempting to remove or operate the spout. Never force the spout, as resistance is a safety feature designed to prevent spills or accidents. Insert the nozzle fully into the tank opening, then activate the flow by triggering the spout’s mechanism. Keep the can tilted just enough to control the flow, but avoid excessive tilting which can cause spillage.
When you finish fueling, release the lock to close the spout completely before lifting it from the tank. Immediately replace the cap on the can’s opening to seal the container and preserve the integrity of the seal. If you notice the spout sticking or leaking, it’s likely due to dried residue blocking the mechanism or a worn O-ring. Instead of forcing it, replace any damaged or worn parts for a secure fit and safe operation.

Compatible with the spout/neck of Scepter Smart Control gas, diesel, kerosene, fuel, and utility cans/jugs.

10-PACK EXTREME VALUE: Includes ten replacement O-rings – enough to fix up to 10 leaking Scepter gas cans. Single-ring cost is a fraction compared to 4-pack or 8-pack options. Perfect for customers with multiple fuel cans, small farms, or fleet use

Includes six (6) #00358R Gas Can Spout Seals compatible with Scepter Easy-Flo spouts, Rotopax RX-R3G, and many other common standard plastic jerry can spouts, including 1, 2, 2.5, 5, 10, 20 gallon cans and 5 and 10 liter jugs/tanks.
Why You Should Vent the Can Before You Pour
Venting the can before pouring is essential because it relieves built-up vapor pressure that can cause fuel to surge or sputter unpredictably. When you lift the vent, trapped pressure escapes, preventing sudden fuel bursts and splashing. This control makes for a smoother, more consistent flow, avoiding the stop-and-start mess that occurs when pressure builds up inside the can. Proper venting also reduces fuel evaporation, helping keep your fuel stable and lowering vapor loss. To vent, press the dark green lever and slide the green block forward—then you’re ready to pour securely and with greater efficiency. Using a propane tank for generator safety similarly requires understanding proper vapor pressure to avoid dangerous fuel system issues. A reliable power inverter also demands a car battery that can handle sustained discharge rates without voltage drops. The Scepter 5G Gas Can is equipped with a flame mitigation device to prevent vapor ignition, further enhancing safety during refueling tasks. Just as with deep cycle batteries, testing your can for pressure buildup before use can prevent unexpected failures and extend the life of your equipment.
How to Open the SmartControl Spout in Two Steps
To open the SmartControl spout in two steps, start by venting the can. Then, press the dark green lock tab with your palm, pushing it upward or forward to disengage the child-safe system. This step is crucial because fuel will not flow unless the lock is released. Make sure not to skip this, as forgetting it prevents any dispensing. The spout controls flow rate by allowing you to adjust the grip pressure for precise top-ups. To ensure the stabilizer remains effective, always add stabilizer before filling the can with fresh fuel, not after. Similarly, avoid connecting multiple surge protectors in series, as this can overload circuits and create a fire hazard. For marine applications, a boat battery charger should match the battery type and capacity to avoid damage.
Next, position your fingers over the black grip. Squeeze the large green block forward using your palm. Pushing it fully will give you maximum flow, while applying lighter pressure will result in slower top-ups. The spout is designed with a self-closing feature: once you release the pressure, the flow stops automatically. Although some cans have additional safety features, Scepter’s straightforward two-step process ensures controlled, deliberate pouring every time. Remember, only open the spout when you are ready to pour.
What to Do If Your Spout Feels Stiff or Stuck?
If your spout feels stiff or stuck, begin by checking the child-safety lock tab. This dark green tab must be pressed upward before the green block can move. It’s normal to feel resistance; this is intentional for safety purposes. Next, perform a pressure release by slowly unscrewing the cap to vent any built-up pressure, then re-tighten it. This step helps reduce binding in the controls. Place the can flat on the ground and try a few dry actuations to help seat the sliding parts properly. Avoid forcing or prying at the components, as this can damage seals and O-rings, making the stiffness worse. Before attempting disassembly, visual confirmation of the internal “U” shape helps ensure proper access to the components. If you continue to experience issues, consider applying a dry lubricant to the spout. If the mechanism remains stuck even after venting and testing, do not force it—replace the spout with a Scepter-compatible SmartControl unit. For worn or damaged parts, contact customer care for guidance. Additionally, always ensure the power inverter is turned off and disconnected before performing any maintenance to prevent electrical hazards. Proper mounting techniques on a roof can help avoid similar binding issues in your equipment. Using a fuel stabilizer for your generator can prevent fuel degradation that leads to gum and varnish buildup, which often causes sticking in fuel system components.
The Right Way to Pour Fuel Without Spilling
To pour fuel without spilling, start by releasing the spout lock. Press up on the small dark green tab and hold it down. Then, move the larger green block forward to open the flow path. Position the spout into the tank opening before tilting the can. This action opens the gas can’s spout by requiring the user to push up on a specific part, then push the green component toward the black part, which is a protective feature to prevent accidental spills. Tilt gradually and steadily, avoiding sudden movements that can cause splashback. For safe operation, constant supervision prevents the battery from overcharging while connected. Use the squeeze-controlled design by squeezing the green block only while pouring to regulate the flow. When the tank nears full, release the squeeze immediately to trigger the automatic stop, preventing overfilling. Pour slowly, allowing gravity to control the transfer rather than force. Always place the gas can on a stable surface before filling it to avoid tipping. Once finished, gently lift the spout to activate the stop, return the can to an upright position, release the control, and tighten the cap. Always check for drips before leaving to ensure no spills occur. Note that using a battery trickle charger can help maintain your vehicle’s battery health during long periods of storage.

【PERFECT FIT, EXTRA-LONG SPOUT FOR EASIER POURING】: The KILWANI upgraded gas can spout replacement is compatible with most 1/2/5/10-gallon plastic gas cans, fitting oil jug mouth sizes ranging from 1.7 to 1.82 inches. The extended 8.1-inch gas can nozzle length ensures greater convenience and pouring flexibility.

TRIGGER HOSE ATTACHMENT: Designed for precise control, this vp trigger hose fits securely on compatible fuel jugs for easy and efficient fuel transfer with minimal mess or waste.

Gas Can Spout Replacement: The upgraded gas tank nozzle kit is more compatible. Gas can mouth sizes from 1.7in-1.82in both can be used, For most 1/2/5/6/10 gallon oil can (Please measure your oil cans mouth size before purchasing) The overall length of the nozzle tube is 8.1 in, which is more convenient and flexible to use
How to Fill Your Scepter Can at a Gas Station
To fill your Scepter can safely at a gas station, follow these four steps. First, set the can on level pavement away from your vehicle, traffic, and ignition sources. Placing it on flat ground reduces static buildup, which is crucial for safety during fueling. Keep the can about five feet from your car to prevent accidental contact with moving vehicles and to avoid spills. Never hold the can while fueling, as this increases static risk and can lead to sparks.
Next, prepare the can. Confirm it is designated for gasoline only to prevent chemical reactions. Check the cap and spout for any damage, cracks, or corrosion that could cause leaks. Vent the container as instructed—usually by opening the vent or cap—to allow air to enter and ensure a smooth flow of fuel when you insert the nozzle. Proper venting also helps prevent the buildup of pressure inside the can during filling. If you are using this gas to power portable equipment, consider that an inverter generator often requires clean, stable fuel to run efficiently. For campers relying on portable power, selecting a model with reliable fuel efficiency can extend runtime significantly during multi-day trips. A slow, steady fill rate mimics the stable current needed to charge a car battery without damaging sensitive electronics.
Then, insert the nozzle correctly. Keep the nozzle in constant contact with the opening of the can’s spout. Fill the can slowly and steadily, especially near the end, to minimize splashback. Watch for signs of fuel backing up or overflowing; if this happens, stop fueling immediately to avoid spills and potential hazards. Ensure the pump is inserted to rest on the second internal ledge for gasoline, as specified inside the container.
Finally, fill the can to about 95 percent of its capacity, leaving room for fuel expansion. Turn off the nozzle and carefully remove it, then reinstall and tighten the cap securely. Close the vent mechanism if applicable, and wipe off any drips or spills with a rag. When transporting the can, keep it away from sources of ignition, and never leave it in a hot vehicle for extended periods to prevent heat buildup.

Multiple Size Options Available: Choose from 2 different sizes and lengths to meet your specific fueling needs - Note: SPOUT ONLY, Does Not Include Fuel Can

HIGH QUALITY: Gas can nozzle kit are made of UPGRADE plastic that not easy to crack,thicker and widened rubber gaskets can better fit the bottle cap, Prevent liquid leakage when refueling

Gas Can Spout Replacement: The upgraded gas tank nozzle kit is more compatible. Gas can mouth sizes from 1.7in-1.82in both can be used, For most 1/2/5/6/10 gallon oil can (Please measure your oil cans mouth size before purchasing) The overall length of the nozzle tube is 8.1 in, which is more convenient and flexible to use
Why You Should Never Remove the Safety Insert
Removing the safety insert defeats a crucial fire safety feature and is strongly discouraged. The flame mitigation device (FMD) is designed to prevent flame travel inside your can, reducing the risk of flashback ignition and vapor explosions. Many assume it’s an obstacle or slows down filling, but in reality, it’s a legal requirement that plays a vital role in safety.
Without the FMD in place, your can becomes a much greater fire hazard. Vaporized fuel ignites instantly near sparks or heat sources, making any removal risky. The insert is engineered to limit flame movement, offering your can a necessary layer of protection. Keep it installed and follow filling instructions carefully. It’s not just a safety regulation—it’s your best defense against dangerous accidents.
Store Your Scepter Can Safely Between Uses
Store your Scepter Gas Can in an outdoor, detached location such as a tool shed or separate garage. Never keep it inside your home or attached garage to reduce vapor exposure risk. Make sure the can is kept sealed and closed tightly to limit vapor release and preserve fuel quality. Place it in a cool, well-ventilated area away from ignition sources like pilot lights, stoves, or heaters. Secure the can to prevent tipping over and store it out of reach of children and pets. Avoid storing filled fuel containers inside vehicles. Additionally, monitor the age of the fuel; Scepter recommends using gasoline within six months for optimal performance. Keep the storage area cool since heat speeds fuel degradation and always use an approved container for safety.
Three Mistakes That Damage Your Scepter Spout
The three mistakes that can damage your Scepter spout are easy to avoid once you know what to watch for. First, always check Thread alignment before tightening the cap. Forcing it on without proper alignment can cross-thread the connection, damaging the threads and preventing a tight seal. This often leads to leaks and makes subsequent use frustrating. Always start the cap straight, then tighten gently to ensure a secure fit.
Second, pay attention to Spout compatibility. Scepter cans are designed to work specifically with their original spouts. Using aftermarket or incompatible spouts can cause improper sealing, resulting in vapor leaks and stress on the nozzle connection. This accelerates wear and increases the chance of dripping during use.
Third, handle the child-resistant lock and squeeze mechanisms with care. Their stiffness is intentional, providing safety during storage. Forcing these parts can break the plastic locking tab or misalign internal components. Use steady, gentle pressure when operating these features to keep the spout functioning smoothly and prevent unnecessary damage.