If you’re wondering how to build a safe and reliable DIY transfer switch for your generator, you’ve come to the right place. This small device lets you power critical appliances during an outage by switching between utility and generator power easily.
By following simple wiring, mounting, and testing steps, you can create your own transfer switch that meets safety standards. Keep reading to see how to put it all together and ensure your setup works perfectly.
Why You Need a Transfer Switch (Not Just a Backfed Breaker)
A transfer switch is essential because it physically isolates your generator from the utility grid, preventing backfeed. While a backfed breaker may seem like a quick solution, it does not provide the complete safety and compliance required. Without a transfer switch, energized utility lines could be re-energized during generator operation, posing a severe shock hazard to utility workers performing line maintenance. Selecting an appropriately sized transfer switch also requires understanding the specific power output capacity of your portable generator setup. Many modern portable generators are paired with portable power inverters that provide stable power, but matching their output to your transfer switch rating is critical for safe operation.
Additionally, electrical codes mandate a method to disconnect both the utility and generator sources simultaneously, ensuring no parallel power flow occurs. A backfed breaker alone does not satisfy this requirement. Instead, properly listed transfer switches or approved interlock devices are designed to meet these standards and ensure safe operation. However, if a backfed breaker is used, a hold-down kit is required to secure the plug-in breaker and prevent it from coming loose, ensuring code compliance as per NEC 408.36(d). Understanding the price range for trickle chargers can help you budget for other essential safety components like these kits.
Using a transfer switch offers a controlled, repeatable process that keeps the utility grid de-energized while your generator supplies power. This setup not only prevents dangerous backfeed but also protects your equipment from damage due to improper switching or overloads. Relying solely on a backfed breaker leaves room for human error and potential safety violations, making a transfer switch an essential piece of your generator safety system.
What Should You Check Before Buying a Transfer Switch?
Before buying a transfer switch, you need to verify several key factors to ensure compatibility and compliance. First, check that the switch meets essential standards like UL 1008 listing and adheres to your local electrical codes; these are mandatory. Next, confirm compatibility with your existing panel, paying attention to the brand, model series, and breaker type—mismatch can lead to system issues. It’s also crucial to match the generator’s voltage and amperage with the switch’s inlet and cord set exactly, preventing potential overloads or connection problems. Additionally, consider using a high-quality battery like a deep-cycle AGM to power sensitive electronics through the inverter without voltage drop. To keep generator fuel fresh during storage, it is wise to treat the tank with a stabil fuel stabilizer before running the system under load. For diesel generators, remember that fuel is typically stored in yellow containers to avoid confusion with other fuels.
Additionally, review your neutral and bonding arrangements. Shared-neutral setups can cause breakers to trip unexpectedly, so ensure the transfer switch’s configuration aligns with your system. Measure the physical space available in your main panel to accommodate the switch and verify your panel’s feeder capacity is sufficient for the additional load. If your installation requires a service-entrance-rated model, plan accordingly. Finally, confirm that a licensed electrician is available to install the switch correctly, as improper installation can compromise safety and function. Doing these checks before purchase helps avoid costly mistakes and ensures a reliable emergency power setup.

This is the original, authentic, and patented EZ Generator Switch

Professional Transfer Switch: This generator switch comes with a circuit breaker which can be switched directly manually, the rating is 15Amp 125V. This transfer switch can quickly and safely switch emergency power in case of sudden power outages

Excellent Quality: This 200 amp transfer switch is UL listed and its housing meets NEMA 3R standards, making it rust-proof, durable, and weatherproof. It can withstand harsh weather conditions and ensure uninterrupted functionality even in rain, hail, or high winds
Choose the Right Size: 6-Circuit vs. 10-Circuit
A 6-circuit transfer switch typically supports up to six single-pole circuits, making it suitable for smaller backup setups that focus on essential loads. It is more affordable and takes up less space on your electrical panel, making it a practical choice if you only need to power critical appliances like your refrigerator and sump pump during an outage. Keep in mind that a 6-circuit model is limited in capacity, so it’s best when your backup needs are straightforward and targeted. For safety, never use kerosene in a gas can as it can cause dangerous fumes and contamination. If you anticipate needing more circuits or a broader range of power, a 10-circuit switch offers a better solution despite the higher cost and larger size. A surge protective device should also be installed at the transfer switch to protect your generator and connected appliances from damaging voltage spikes. For extended outages, pairing your setup with top automatic battery chargers ensures your backup batteries maintain reliable power.
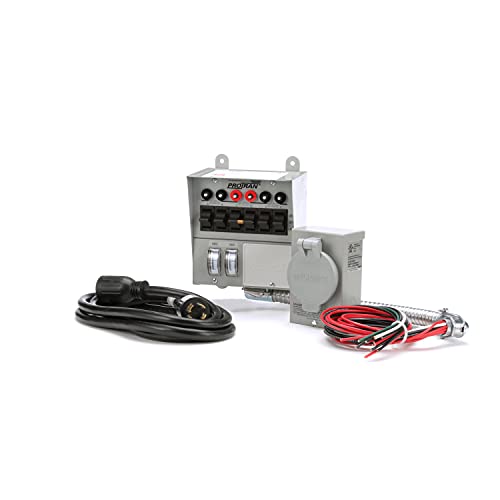

Compatible with 7500W Generators: This manual transfer switch handles up to 30A and 6 circuits, allowing you to quickly switch from the main power to your generator with just the flip of a switch. It provides peace of mind and is a temporary power source during outages

Compatible with 12500W Generators: This manual transfer switch handles up to 50A and 10 circuits, allowing you to quickly switch from the main power to your generator with just the flip of a switch. It provides peace of mind and is a temporary power source during outages
Critical Loads to Power First: Which Circuits Need Your Transfer Switch?
Mapping your circuits helps you prioritize which ones need to be connected to your transfer switch. Focus on the critical loads first by clearly marking each circuit in your panel. These typically include refrigeration, which may require surge capacity for compressor startup, and pumps that need extra headroom from your generator. For prolonged outages, treating fuel with a quality stabilizer prevents degradation and ensures reliable generator performance. When planning your system, remember that DIY solar panel construction requires careful matching of voltage and amperage to avoid damaging your equipment. Reserve circuits for comfort loads, like garage door openers, for later stages once your essential systems are covered. Concentrating on these priorities ensures your transfer switch keeps your home safe, operational, and minimizes stress during an outage. Consulting professional reviews can help you compare top-rated models to ensure your generator and switch are well-matched.
Tools, Safety, and Panel Prep Before Installing a Transfer Switch
Before opening the panel, gather your essential tools and follow crucial safety procedures. Start with an electric drill, flathead and Phillips screwdrivers, a wire cutter and stripper, and nut drivers (1/4-inch and 11/32-inch). Use a multimeter or voltage tester to verify that conductors are de-energized. Always wear safety gear: insulated gloves and safety eye goggles. First, turn off the main power, then test at the breaker output lugs to ensure there is zero voltage before proceeding. For heavy loads, ensure your cord meets the amperage by selecting heavy-duty extension cords that are properly rated for generator use. Selecting a charger that matches the battery type ensures optimal performance and longevity for your marine electrical system.
Perform a thorough inspection of the panel. Confirm that your work area is dry, well-lit, and free of moisture. Check existing breakers for compatibility; you may need a new 2-pole breaker from the same brand. Make sure there is enough space inside the panel and available knockouts for cable entry. Prepare your accessories in advance, including cable clamps, locknuts, bushings, and conduit connectors. Label your circuits clearly to prevent wiring errors. Once these steps are complete, you will be ready to move on to installing the transfer switch safely. For extended backup power needs, consider pairing your generator with a top propane tank to ensure reliable fuel supply.
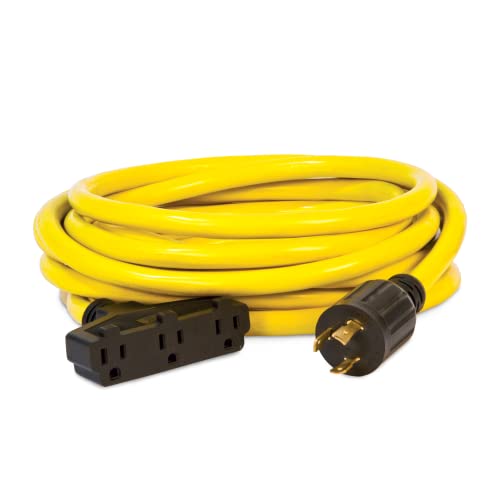
Powerful - Converts a 30-amp locking outlet to three 15-amp household outlets and extends your power up to 25 feet

Up to 1875W Applications: Outdoor extension cord waterproof 100ft 12 gauge, 15 amp, 125 volts, 1875watts; Male power plug NEMA 5-15P; Female power socket NEMA 5-15R; SJTW power cord; ETL/cETL listed; Heavy duty extension cord 100 feet is perfect for any heavy duty use circular saws, string lights, block heater, lawn mowers, gardening, landscaping, construction site, welding work, or powering major appliances

Up to 1875W Applications: Outdoor extension cord waterproof 12 gauge, 15 amp, 125 volts, 1875 watts, NEMA 5-15P to NEMA 5-15R, SJTW power cord, ETL/cETL listed, heavy duty extension cord 50 ft is perfect for heavy duty use or powering major appliances
Mounting the Transfer Switch: Where and How to Anchor It
Hold the enclosure securely against the wall, ensuring it is level. Use the manufacturer’s template to mark the locations for the mounting holes. Then, secure the enclosure using appropriate anchoring methods. Drive screws directly into studs whenever possible for the strongest attachment. If mounting on drywall, use wall anchors suitable for your enclosure’s weight and size. Match the fastener type to your substrate—self-tapping screws for metal surfaces, masonry anchors for brick or concrete. Employ every provided mounting point to ensure stability. Position the switch so its flexible whip aligns smoothly with the panel’s knockout, avoiding any strain or awkward bends that could damage the wiring or compromise mounting stability. This approach guarantees a secure, code-compliant installation.

COMPLETE SET FOR VARIOUS MOUNTING NEEDS: This Heavy Duty Toggle Bolts Assortment Kit includes 164 pieces of drywall anchors, toggle bolts, and screws in multiple sizes to fit different installation requirements. The set contains 40pcs #6×1", 40pcs #5×1", 40pcs #7×1", 20pcs #6×1-1/5", 12pcs #8×1-3/5", and 20pcs black #8×1-1/4" wall anchors, along with toggle bolts in 1/4" (4pcs), 3/16" (12pcs), and 1/8" (16pcs). Ideal for mounting shelves, mirrors, or curtain rods.

Premium Material: These heavy duty drywall anchors, toggle bolt are made of carbon steel with zinc plated surface, plastic wall anchors are made of high-quality nylon plastic, which is rust resistant, wear resistant and corrosion resistant. This ensures the excellent strength and hardness of wall anchor. These dry wall anchors will make your home repair job much easier.
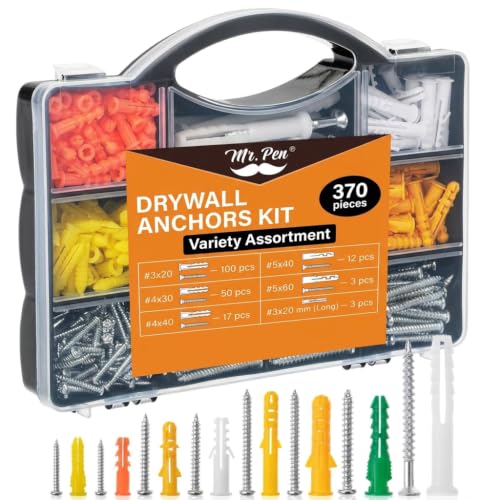
The package boasts a substantial collection of 370 pieces, ensuring users are amply equipped for a myriad of wall-mounting tasks. This vast quantity ensures you have a consistent supply whether you're working on a single room or an entire house.
How to Install the Generator Inlet Box and Connect the Cord
To install the generator inlet box and connect the cord, follow these steps carefully. First, choose a stable, accessible exterior wall near your main electrical panel, ensuring the location is protected from impact and severe weather. Turn off the main power before starting any installation work. Mount the inlet box securely using the manufacturer-provided screws, making sure the weatherproof cover closes properly to prevent water intrusion. Use conduit and weatherproof fittings for wiring entries to maintain a tight seal against the elements. This model, BEBOBLY BB2010, is ETL Listed to ensure safety and compliance for outdoor use. For long-term reliability, consider using a propane tank for home as a primary fuel source to avoid frequent refueling interruptions. For safe operation, always monitor battery temperature during charging to avoid overheating risks. Comparing dedicated chargers helps ensure you choose a model with reliable performance for outdoor use.
Inside the box, route the appropriately sized conductors to the labeled terminals: Line 1, Line 2, Neutral, and Ground. Tighten all terminal screws firmly to ensure secure connections. Safety is paramount—keep the generator and breakers turned off during this process. When connecting the cord, insert the male plug into the generator outlet first. Then, connect the female end of the cord to the inlet box with a clockwise twist until it locks in place. An indicator light on the inlet box confirms that the connection is successful. Only start the generator after both cord ends are fully secured to prevent electrical accidents.

🚩【Pre-drilling Design】: RVMATE 50 Amp generator inlet box is easy to remove and replace the wiring caps without using special tools (such as driller/knockout punch) or finding an electrician . RVMATE pre-drilling generator inlet box saves your time and money.

50-Amp, 120/240 VAC generator power inlet box

Generator Power Inlet Box: Power inlet box is an outdoor/watertight electrical inlet for a 30 Amp L14-30 generator cord. 125/250V, 7500W. Max wire Gauge:10AWG. It is designed to be installed outdoors in an open area where the generator is being used and perfect for backup power during a power outage
Wiring: Moving Circuits From the Main Panel to the Transfer Switch
After you have mapped the circuits you plan to back up, the next step is to move them from the main panel to the transfer switch. Begin by turning each selected breaker OFF and then carefully disconnect the hot and neutral conductors from their terminals. It’s essential to label every wire to ensure you can identify them easily during installation and future troubleshooting. Always avoid overstripping wires to prevent weakening connections, as stressed in proper wiring techniques.
Route the branch wiring to the transfer switch using conduit approved by the National Electrical Code (NEC). Proper organization of wiring now prevents confusion and simplifies future maintenance. Connect each hot conductor to its designated position on the transfer switch breaker. Attach the neutral wire to the neutral bus bar and the ground wire to the ground bus bar, following all local electrical codes. For 240-volt loads, use a double-pole breaker arrangement to supply the necessary voltage.
Ensure neutrals and grounds are kept separate according to code requirements. Also, verify that each circuit’s rated amperage matches the breaker size in the main panel. If a circuit is a multi-wire branch circuit, move the entire circuit—don’t try to split it between the main panel and the transfer switch. Proper wiring methodology is crucial for safe and reliable operation.
Test Your Transfer Switch Circuits and Run the Generator Safely
Before powering up your transfer switch, perform pre-test safety checks. De-energize all sources and lockout/tagout both utility and generator to prevent accidental energization. Use an accurate AC voltmeter to verify proper electrical grounding; this step helps avoid shocks and equipment damage. These safety protocols are essential and not optional.
Test each circuit individually by turning all breakers OFF first. Then, energize one circuit at a time while monitoring load readings to ensure you do not exceed the generator’s continuous wattage capacity. A deep cycle battery used for generator starting typically requires a high amp-hour rating to ensure reliable cranking power during prolonged outages. This approach prevents overloads that could damage your generator or connected equipment.
For utility-to-generator transfer, start your generator outdoors in an open space to avoid carbon monoxide buildup. Open the utility supply and confirm that the transfer switch shifts correctly from utility to generator power. Afterward, restore utility supply and verify that the switch transfers back smoothly. Proper testing ensures your system functions reliably during an outage. Consider reviewing top generator reviews to compare performance and value when selecting your power source.
Run the generator safely by keeping it outside in a well-ventilated area. Before manual steps, set its main breaker OFF to prevent accidental energization. Check fuel and oil levels regularly to avoid operational issues. When bringing circuits online, do so gradually, adding one circuit at a time while monitoring load to prevent overloads. Perform monthly tests, inspect indicator lights for proper operation, and always use insulated tools during testing. For complex procedures, have a second person present to assist and enhance safety.